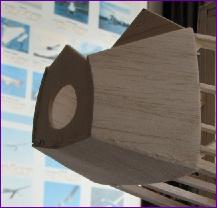
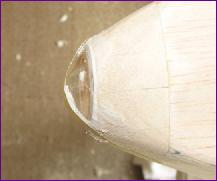
Having sheeted the nose to the stage shown on the right, I needed to sort out how the landing light would fit, because, once the top of this nose section was sheeted in, it would all become rather inaccessible. I wanted the light to be pretty powerful so it had a chance of showing up in daylight so ordered a couple of 12v 20W MR8 halogen lamps, so the next step was to carve a noseblock and try to fit the lamp in it.
Whilst this first attempt at a noseblock did serve to clarify the idea of mounting the lamp up against a ply retaining ring, when I came to shape the block it was undersize. As you can see, I made a few futile attempts to build it up before abandoning it and starting again.
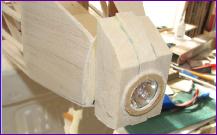
This picture shows the MR8 lamp mounted on the front of an extended battery tray which serves as an insertion tool . .
. . allowing the lamp to be pushed forwards against the ply retaining ring as shown here.
This picture also shows the Mk.II noseblock being built up in situ - Once bitten. . !
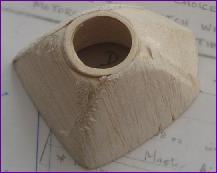
Shaping of the Mk.II block went better but the shape looked all wrong. So here it is, marked up for a bit of cosmetic surgery!
With the addition of an acetate lens (moulded from the agate egg shown on the main diary page), the nose job finally started to look the part.
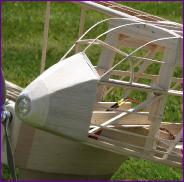
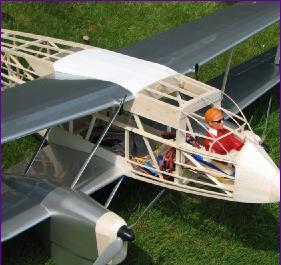
A few days later, I took the model along to our flying club's monthly meeting where Mike Roach took this picture. Well, I said I wanted the light to be bright, didn't I!
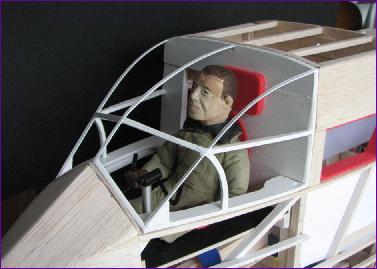
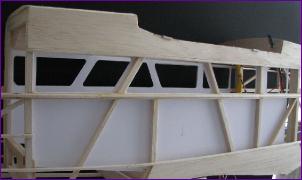
You can also see from these pictures that I have managed to make a framework for that all-glazed cockpit. The curved members are thin strips of 1/32in ply. The plan is to glaze the cockpit with four pieces of acetate, hopefully without the need for any moulding. We shall see.
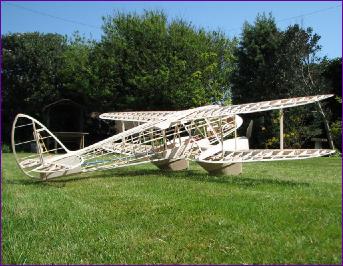
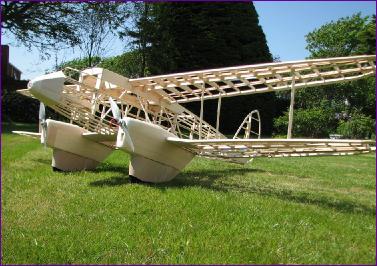
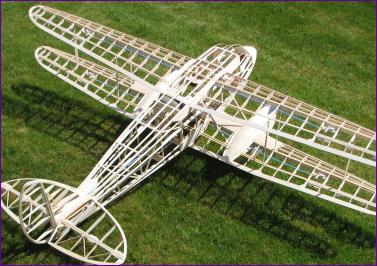
With all the fuselage stringers now in place and the top and bottom wing fairings sorted out, the basic structure of the Rapide was now more or less complete.
Sooner or later I was going to have to face up to the challenges of the cockpit and cabin interiors, but I realised I could put that off for a little bit longer by covering the wings.
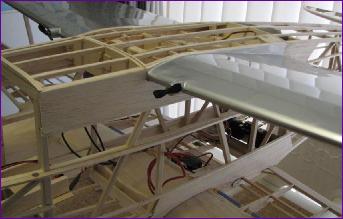
First though I added the dummy generators to the top wing. . .
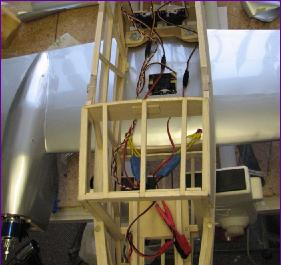
. . and once the lower wing was covered, the real electrics were ready for a sort out!
The speed controllers are permanently wired to the lower wing so the wires have to be pushed forward under the cabin floor as the wing is fitted.
I hadn't got much further with the covering when my covering iron gave up the ghost.
By now, I was beginning to realise that the pilot I had bought was just a shade too big.
While pondering the pilot problem and waiting for my new covering iron, I made a start on the cabin interior. Walls, ceiling and floor were lined with cardboard.
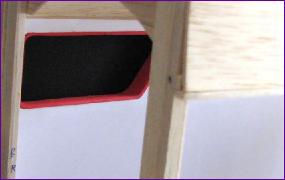
When it came to lining the windows, I used a material called Funky Foam. I was put onto this material by my wife, who had bought some for our grandchildren to play with. Works well for the adult children amongst us too!
Eventually though the cockpit could be put off no longer. Mike Roach managed to find a civilian head for an old full bodied "Pete's Pilot". Stiffened with a piece of dowling and a couple of bits of wire, then stuffed with cotton wadding, Pete was eventually installed, with seat, control column and instrument panel.
By the end of the month, the main tasks outstanding were the completion of the covering and the glazing of both cockpit and cabin. There was also the matter of the BEA livery to think about. Nonetheless, I was beginning to feel that this 'Winter' project might at least be finished by Midsummer's day!
 Having sheeted the nose to the stage shown on the right, I needed to sort out how the landing light would fit, because, once the top of this nose section was sheeted in, it would all become rather inaccessible. I wanted the light to be pretty powerful so it had a chance of showing up in daylight so ordered a couple of 12v 20W MR8 halogen lamps, so the next step was to carve a noseblock and try to fit the lamp in it.
 This picture shows the MR8 lamp mounted on the front of an extended battery tray which serves as an insertion tool . .
 . . allowing the lamp to be pushed forwards against the ply retaining ring as shown here.
 Shaping of the Mk.II block went better but the shape looked all wrong. So here it is, marked up for a bit of cosmetic surgery!
 With the addition of an acetate lens (moulded from the agate egg shown on the main diary page), the nose job finally started to look the part.

 You can also see from these pictures that I have managed to make a framework for that all-glazed cockpit. The curved members are thin strips of 1/32in ply. The plan is to glaze the cockpit with four pieces of acetate, hopefully without the need for any moulding. We shall see.
 . . and once the lower wing was covered, the real electrics were ready for a sort out!
 I hadn't got much further with the covering when my covering iron gave up the ghost.
 By now, I was beginning to realise that the pilot I had bought was just a shade too big.
 When it came to lining the windows, I used a material called Funky Foam. I was put onto this material by my wife, who had bought some for our grandchildren to play with. Works well for the adult children amongst us too!