Adrenaline Review
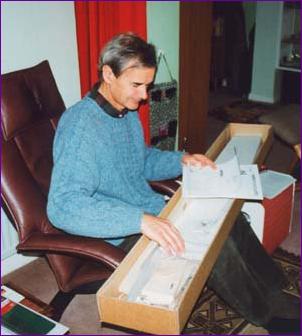
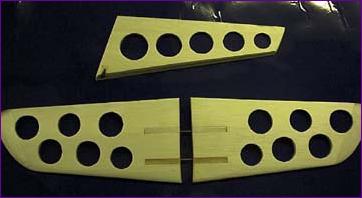
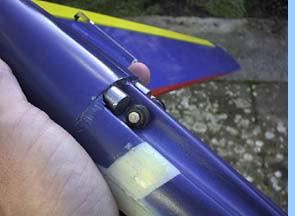
A Christmas present reviewed by Trevor Hewson (Originally written in 1999 for 'Sloping Off', the Newsletter of the Christchurch and District Model Flying Club) Present and Presentation Wing Wizardry Investigation of the front bolt hole shows a stout ply insert which, according to the instruction leaflet, transmits the inevitable stresses to further carbon fibre elements in the wing. No need to spoil the one-piece veneer surfaces by bandaging the joint. With so much work already done, it seems almost surprising that the buyer has to fit the leading edges and wingtips. The LE's are square section obechi strips of good quality and the tips are cut from a balsa/ply/balsa sandwich so that they can be easily shaped whilst retaining a measure of ding resistance all round. Once the tips have been fitted, the wing will no longer fit back into that lovely box. Shame that. Servo wells are milled out into the foam (although I did need to deepen them) and tubes for the servo leads are built into the wing. No servo covers are provided. Fuselage Focus The first thing that strikes you about the fus is that, in spite of the long box, someone has sawn the nose off! The second thing that strikes you is that there appear to be two nose sections. It soon becomes clear that the 'extra' nose section is to be glued into the tail section, leaving the sawn off nose to form a detachable sheath. This is a very neat and practical arrangement for the finished model and also means that, before the nose section is fitted, access to the tail section for installing linkages, aerial tube and wing fixing nuts is still quite possible, in spite of the lack of a wing seat aperture.
Other Bits Assembly Order, Order! Weighty Matters
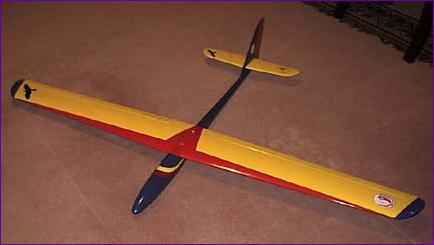
I used Hitec HS80 servos for rudder and elevator, but for the ailerons, I pressed into service two of the old Harry Brooks micro servos. These were very cheap and cheerful servos sold a long time ago when even a mini servo from a main brand manufacturer would have set you back £30 to £40. I acquired four of these (plus speed controller, gyro and motor) with the second hand Kyosho Concept EP electric helicopter I bought back in 1993. I damaged one of the servos fairly early on but, after 175 flights, the other three seemed as good as new and (and this was the real clincher) they are fitted with servo leads long enough not to need extending! Since these old servos owed me nothing, I was happy to chop the mounting lugs off and stick them in with bath sealant. A few judiciously placed balsa blocks serve both to prevent any movement and also to support the servo covers of mirralite ply. The tail end is all straightforward - if installing the pivot for an all-moving tail can ever be described as straightforward. So now it's all about... Finishing First though, a quick check of the Profilm stock showed enough ex-Stearman yellow to do one half of the flying surfaces and enough blue to do the other half. Following the 'light top, dark bottom' visibility rule suggested a blue fus, so the next task was to find some blue paint to match the Profilm. I eventually chose an acrylic car paint, applying an acrylic plastic primer and a coat of filler primer before rubbing down and spraying the top coat. For once, the painting process passed off without major hitch and the end result is quite passable. Returning to the film covering, I contemplated the colour change along the leading edge. Joins here are never a good idea. Quite apart from the problem of getting a neat straight line, there is always the risk of the film lifting in the face of the onslaught of the slipstream. Another rummage in the film stock, and a red leading edge flash was added to the colour scheme and, just to pretend that it was planned this way all along, the rudder was covered in red, too. Covering the already hinged ailerons posed a few problems, but, once a few stripes of film had been added to the fus sideto help line up the nose cone, I took a few paces backwards and the finished product looked pleasant enough.
All that remained now was to program the radio. The instructions give control surface movements for aileron, rudder and elevator and for an up-aileron spoiler function. Coupled elevator and flap is also suggested and, by the time I had arranged the option for a bit of down flap for height gain, I had re-programmed my FF7 transmitter three times. My real problem though was that the cheapo aileron servos were having a hard time with the somewhat stiff aileron hinges. Disconnecting the linkage and vigorously exercising the hinges helped a bit, but I had to settle for less up aileron in the airbrake function in order to ensure that aileron control would not be lost when the brake was activated. I hope that the hinges will free up with use. All Systems Go After the usual checks, Jim launched the Adrenaline and it was evident from the start that this is a very well mannered aeroplane. Somehow the model inspires confidence - you know it is going to do what you tell it to. It also soon became clear that the recommended cg was, as the instructions indicated, on the safe side, so after a few minutes familiarisation, a landing was called and some lead removed. The second flight was better, but the light conditions didn't allow the model's flight envelope to be explored, and the sea mist was closing in. I felt the model was still a bit nose heavy, but it was time to call it a day and wait for a better day. Back home, a bit more lead was removed. Take Two The Adrenaline was fully at home in the conditions, but I have to confess that I wasn't. The lift was tremendous and, every time I found an empty piece of sky, it seemed like it would immediately be bisected by a high speed piece of plastic. Nonetheless, I managed to thread my way through the traffic for ten minutes or so and found the occasional opportunity to enjoy the smooth aerobatic behaviour of this very pilot-friendly model. I look forward to much more of the same, in somewhat clearer skies. Wrap Up
|
||