Diamonds are Forever
by Trevor Hewson (Construction article originally appearing in RCM&E September 1991)
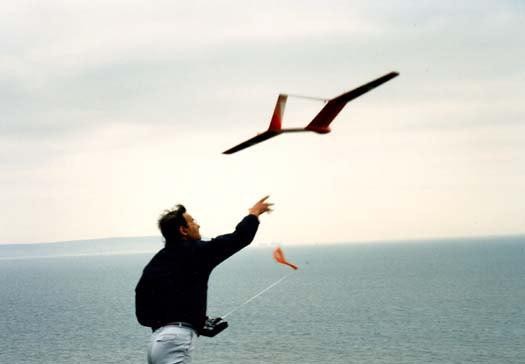
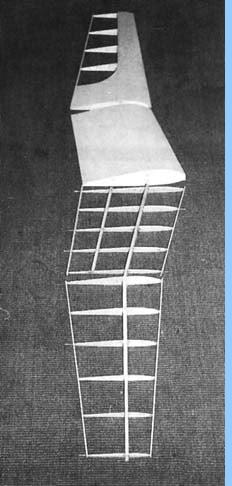
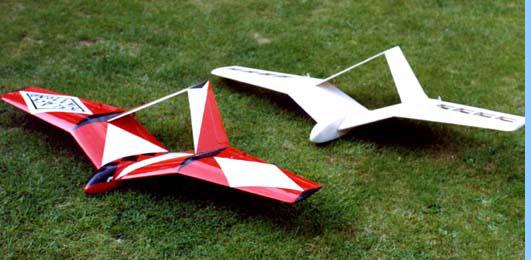
All I knew about my next model was that I wanted it to be different. But different from what? Different from everything I suppose. I remember looking at PSS kits and being mildly disappointed at not finding a twin boom subject. Anyway. I thought, twin booms are probably a bit vulnerable so perhaps I'll abandon that line of thinking and build a flying wing instead. But somewhere along the line I must have got hooked on the idea of attaching the tailplane at the ends, so this self-contradictory concept of a flying wing with a tailplane began to take shape. In truth it didn't take shape for quite a long time. I am an inveterate doodler and time after time these peculiar not-quite-flying-wing shapes kept appearing. In the interests of keeping my job, I knew I had to get this thing out of my system! Eventually all the lines came together in a not entirely repulsive shape - just at the time my new model room was finished. The new building board beckoned enticingly! The next club meeting was foam wing cutting night so the omens were good to embark on this project. Since almost every aspect of this design was experimental I thought it would be a good idea to at least start with a wing section that was known to fly. I therefore looked out the plans for the Obelix, a slope flying wing from RCM&E (Jan. 1983), and used the templates from this to cut a pair of outer wing panels. The size of these was determined by the foam block that came to hand and following the proportions of my best sketch, it looked like I would end up with a span of just over 50 inches. This was definitely going to be a one piece model so this seemed to be quite a handy size. Diamonds Are Forever The additional half ribs support the ends of the servo bearers and provide an anchor point for the snakes. By extending these half ribs downwards to the full depth of your servos they also serve to define the cross section of the fuselage. It is worth doing a trial fit of the servos at this point and making sure you are really satisfied with the run of the control snakes. I would also strongly advocate the installation of an aerial tube in the wing to avoid having a long, untidy and vulnerable wire streaming out the back of the model. In spite of the unorthodox appearance, the controls are perfectly conventional, using ailerons and elevators. The only minor complication is the need for twin snakes for the two elevators. Remember that, unlike the ailerons, the elevators should both move the same way! I resisted the pressure from some fellow club members to fit a V-tail mixer for rudder operation, but did agree to make sure the aileron differential worked in the right direction. When using direct snake linkages. putting the horns on the top of the ailerons makes it easy to provide any amount of differential at the servo. If you don't fancy the horns on the top you can either mess around with bellcranks or, heresy of heresies, forget the differential altogether and remember to put a bit of reflex in the ailerons instead. More letters on that one, no doubt! You can now sheet in the complete wing panels, and add the leading edges, trailing edges and tips. Finally join the two wing halves together inverted with the tops of the outer panels flat on the board. You did remember to thread the servo bearers in didn't you? The fuselage is little more than a battery box on the leading edge, faired in along the wing centre line. Fit the ply doublers first, gluing them to the protruding half ribs, then drawing them in on the nose former. Next cut away the centre section sheeting and root ribs behind the main spar sufficiently to accommodate the receiver. A little glass and epoxy, particularly around the joint in the top spar and webbing, will make up for the damage you have inflicted. You can now add 1/4 inch and 3/16 inch balsa to build up whatever shape fuselage you fancy - just make sure you can get the gear in and out! Now to the tricky bit. Aesthetically the tail ought to grow out from the dihedral break, but this would result in a positive angle of attack with respect to the wing - precisely the opposite of what we need! Drawing in the leading edges of the tail overcomes The Name Game Diamond Flight I had woken up that morning haunted by fears of pitch instability and pushed an ounce or so of lead up the nose but in truth pitch stability and pitch trim were still unknown quantities. Not for long! On launch the Black Diamond raised its nose and headed for the skies. I never got near the trim lever and only when I got the stick pushed fully forward did the model respond. Even with the stick pressed hard against the end stop there was no question of penetrating the 20mph breeze and for what seemed like an age the model sat there in an apparently stable hover drifting slowly back toward the bushes. Suddenly the nose dropped and in a flash the model was down with a thud. Fortunately damage was limited to some shock cracks around the base of the tailplane and, since it was obvious that the reflex was excessive, the tail was destined to come off anyway. The sudden tuck under seemed to be indicative of a rearward CG so, with a touch more lead and a generous helping of down elevator trim, we came to flight number two. Considering that almost 3/8in of down elevator was necessary to counter the excess reflex the model flew remarkably well. I have since re-aligned the tail and, freed of the induced drag from all that down elevator trim, it now handles very cleanly and is remarkably efficient in light lift. Rolls are an interesting manoeuvre to watch (where do you think the axis of an axial roll should be?) and loops are very groovy. inverted performance is very good, thanks to that Obelix section, and roll stability seems to be greater upside down than the right way up - perhaps due to the gull wing configuration? Surprisingly, pitch control is impeccable either way up and the model flies happily with no aileron reflex. The prototype weighed in at just 28 ounces and with a fully built up wing even lighter Black Diamonds should be possible. Ballast can be accommodated behind the main spar if the going gets rough. The Black Diamond will tip-stall. but not without warning, and it can be safely 'hovered in' (or even caught!) at cramped landing sites. Conclusion
|
|