![]()
![]()
![]()
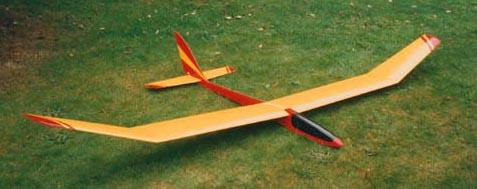
Sailplanes International Osprey 100
Kit Review by Trevor Hewson
(Originally written in 1988 for 'Sloping Off', the Newsletter of the Christchurch and District Model Flying Club)
Having been on the lookout for some time for a 'floater' for marginal slope days that would also serve for use on the flat, my attention was caught by the 100" Osprey on display at Sandown this year. After checking a few details with Sailplanes International, I sent off my cheque and looked forward to receiving the kit.
Even though delivery had been predicted as two to three weeks, I followed my normal practice with mail order and asked to be notified promptly if delivery should prove not to be possible within 30 days. Time passed... Two weeks. Three weeks. Four weeks. No kit, no advice of delay. Not even an acknowledgement of my order.
At about this time rumours began circulating that the kits were in fact ready for dispatch but were held up awaiting artwork for the box lid. Now I can understand that retailers may appreciate an eye catching picture to put on their shelves but, given the choice of a plain box or no plane at all, I think the average modeller's preference is pretty predictable! An enquiry to Sailplanes International produced a not very apologetic letter explaining that they were held up by the supplier of wing joiners who in turn told them he was awaiting delivery of the wire from which to make them.
Eventually the kit arrived. Total delivery time 47 days. the artwork on the box was excellent, the wing joiners beautifully bent and the airbrakes I had asked for were duly enclosed. An invoice for the airbrakes followed a few days later just as I was beginning to think that they had waived the charge in recompense for the delay - well one lives in hope!
On opening the box the immediate impression is of a very carefully kitted model. The very clear full size plan is neatly rolled and separate building instructions and a detailed parts list are included. The strip wood is taped in easily identified bundles and shaped parts are numbered making cross-checking with the parts list straightforward. Leading edges and trailing edges are from shaped stock and the fuselage top decking has the slots for the wing band and fin pre-cut. The 'bag of bits' is comprehensive and of good quality, metal clevises for instance being supplied. A plastic moulded canopy/hatch cover is supplied but otherwise construction is all built up using traditional materials. All wood is of good quality although the sheets of die cut wing ribs in my kit varied enormously in weight. If this is the case with your kit you will pair them off before you start building won't you - just like I didn't!
Construction
The constructional design of the Osprey 100" is best described by the phrase so popular with the plans catalogues: 'simple yet rugged'. To my mind the simplicity verges on the basic in some places and I'm sure that a little constructional refinement could shed quite a few ounces but at least there is no temptation to beef it up! Wing construction is conventional - spruce spars for inboard sections, balsa outboard of the dihedral break. Leading edge sheet and balsa spar webbing, continued right to the tips, gives a very stiff structure even before covering. Brass tubes for the wing joining rods locate in five ply ribs (with balsa doublers) in each root - again reassuringly solid. The tip panels butt join onto the inner panels and are shown as reinforced with linen tape (supplied). I felt this would look a little agricultural and decided to omit the reinforcement altogether. Time will tell if this was wise!
Fuselage construction uses the ply /balsa box method. The ply sides are thick (almost 3/16") and although this is 'lightweight' ply, it still seems a rather chunky approach for a floater. On the other hand the gluing area provided by this extra thickness does away with the need for longerons which goes some way to offset the weight penalty. When I came to fit the prefabricated top decking I hit my first problem. Instead of sitting nicely on top of the ply sides, it dropped through between them. Careful comparison with the plan showed the ply former at the back of the wing seat to be 1/4" too wide! Sailplanes International tell me they are replacing the former and sent me the correct one to prove it - not that it was much use to me by then! Still, if your Osprey has the wrong former 4, then I can help you out!
To be fair, this was the only significant error in the kit. There were a number of detail problems, none of them crucial but all mildly irritating: The plastic canopy is a poor fit, the wing tip blocks just a sliver too thin, the elevator snake of marginal length, the closed loop trace, thoughtfully cut in two - one piece 2" overlong, the other 1.5" short, elevator horn fouling the rudder, etc. All in all, enough to suggest that no-one has taken the trouble actually to build one of the production kits before letting them loose on the public.
Sailplanes International tell me that these problems will be attended to in the next batch of kits and I must say that, in spite of these niggles, the Osprey generally went together well and the end product is a pleasingly elegant, albeit conventional looking, 100" soarer. Mine came out just under 3lb including airbrakes and an ounce or two of noseweight, so the nominal weight of 2lb 12oz sounds about right for the sans-brakes version.
Flying
So - to the slopes! The first flight took place at Ibberton. Conditions were good with far too much lift to put a floater to the test. Nonetheless it was a good opportunity to check out the handling and trim without having to scratch for lift. The handling was fine, responsive to the rudder and vice-free. I decided to check out the stall characteristic and, heading into wind, eased in full up trim. No problems. I pulled the stick back steadily. No problem - but no stall! I made a note to take out that last little bit of extra lead before the next flight and set about checking the response to the brakes. Now the brakes were mounted sufficiently inboard to affect the airflow over the tailplane. I need not of worried. There is no obvious change in handling, the model simply loses height instead of gaining it band responds normally. (later experience has shown that turning when the brakes are deployed can result in some Dutch rolling - best to get lined up on finals before using them). When the time came to land, I took the model way back over the hill and circled there for a while. After a time it was obvious that the Osprey was happy to play this game for as long as I was so eventually I deployed the brakes and landed. A promising start.
The next weekend we were at Win Green. the slope lift was very light with patches of sink and good air drifting through - perfect floater weather! Over several flights I progressively removed noseweight until the cg was slightly to the rear of the nominal position. In this trim the Osprey indicates lift clearly and still has a barely perceptible stall. When you've worked up a bit of height, loops, rolls, and inverted flight are more interesting ways of shedding it than using the brakes and, for a 100" model it is remarkably agile and has a good turn of speed. But I forgot, it's supposed to be a floater! Well on one occasion during the day it out-stayed Peter's Hi Phase so I think it qualifies!
In the club thermal competition the Osprey proved to be very well mannered on the line and stayed up with the best of them. I'll draw a veil over my own performance but suffice it to say there was no way I could blame the model!
Conclusion
On the performance to date I am well pleased with the Osprey 100. It meets my need for a floater, is sufficiently aerobatic to relieve the boredom, handles well and has enough penetration to cope with a fair range of wind speeds. At £44.95 it is sensibly priced - just make sure you check former 4!
![]()
![]()
![]()