Lazy Bee 2009 Refurbishment
Over the years, the Lazy Bee has seen quite a bit of flying. It has flown from both land and water, carried a working payload during trials of a radar altimeter and has had a few mishaps along the way. As a result, it was beginning to look a little tatty and my strategy for dealing with punctures in the covering by putting a sticker over them was getting a bit out of hand.
The final indignity though came when the model was blown off my stand, landing on its tail and punching the tailplane out through the side of the fuselage. A quick injection of cyano and a few lengths of tape to join the shattered covering soon got the model in the air again, but I eventually took pity on it and decided that it deserved a bit of refurbishment.
The Kyosho 480T motor and Olympus belt drive had given faithful service for over 13 years, the only maintenance being one replacement set of brushes in the motor. The original 1700mah NiCds had given way to 2000's then 2400's, but I had never bothered to change to the higher capacity NiMh cells and, by the time of the refurbishment, all my other models had been converted to LiPo power, so this was clearly the opportunity to do the same for the Lazy Bee - and finally pension off the powerplant in favour of a direct drive brushless outrunner.
Stripping Off Removing the covering from the wing was straightfoward. A wave of the heat gun was enough to soften the Balsaloc adhesive and the Litespan peeled off cleanly. There was a bit of repair work to do on the wing structure and I added a couple of spar webs at the wing tips. These are not needed for flight loads but I had managed to break the 1/8in square balsa spars when handling the wing, so it seemed a worthwhile thing to do.
Stripping Out
A look at the motor confirmed that the brushes were indeed worn, but by no means worn out. The commutator was shiny and clean and the motor was still running well, so it just goes to show that a little carbon goes a long way.
Hacking About
The picture on the right shows just how different the two motors are. As well as the different mounting requirements they also differ markedly in weight, the new motor being just 4.25oz compared with 7.75oz for the original geared unit.
Another issue was that, because the output shaft of the belt drive lies above the motor, the thrustline can be very close to the top of the fuselage. This high thrustline important because the Lazy Bee undercarriage arrangement otherwise would give very poor propeller ground clearance.
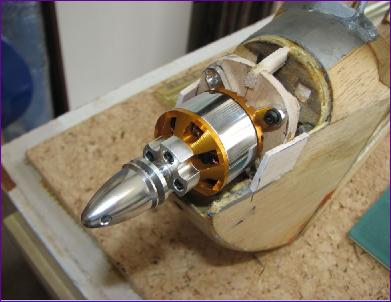
Fixing the new firewall in place was not subtle - just a good dollop of epoxy! As you can see on the right, the captive nuts had to be ground down somewhat and even so, the thrustline is still about half an inch below where it used to be.
At last, with some 1/16 balsa sheet (and a fair bit of filler!), the motor is beginning to look comfortable.
With the motor issue now resolved, it was time to prepare the rest of the airframe for re-covering. Before doing so though, I put the model back together as best I could, in order to see how far the battery would have to move forwards to compensate for the lighter motor. The rather bewildering answer seemed to be 'not at all'!? The battery is slightly behind the cg and the 3s 3700mah LiPo is a bit lighter than the 7 cell NiCd originally used, so that might explain it. If so, the model must have been dreadfully nose heavy when I tried a 2s 3700 LiPo as a direct replacement for the 7 cell NiCd with the original powerplant. Maybe that's part of the reason why the Bee always seemed nicer to fly on NiCds?
There were quite a few minor repairs to be done to the fuselage but overall, I was impressed with how well it had stood up to the years of abuse. The bottom sheeting was rather wavy, no doubt due to water ingress, but I decided to leave it be.
One disappointment was that I was unable to shift the pins in the control surface hinges. I did get as far as picking up the hacksaw to cut through them but held back at the last moment and instead opted to fiddle the new covering into place with the control surfaces in situ. In the end this didn't turn out too bad but it was a really fiddly job and I wouldn't want to do it again!
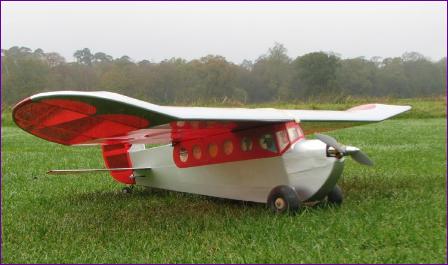
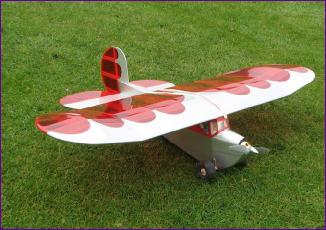
Because of the weight saving coming from the motor and battery technology upgrade, I felt no need to try to save weight on the covering this time so went for Profilm instead of the original Litespan. In thinking about the colours though, it did seem that the wing really needed to be translucent, and I didn't want to bother re-covering the (silver) floats so in the end, settled for silver and transparent red.
Whilst the re-furbished Bee is by no means a pristine new model, it certainly looks a lot better than it did and feels a good deal less rickety too! Having now flown it, the performance is much improved (see Key Data table for figures) and a 12 minute flight took about 1000mah out of the 3700mah battery so two flights out of each battery pack will be the norm.
The other conclusion from the test flights was that, with the cg as per plan, the model is neutrally stable in pitch so, in the interests of more docile handling, I have since moved the battery forward a bit.
|
||
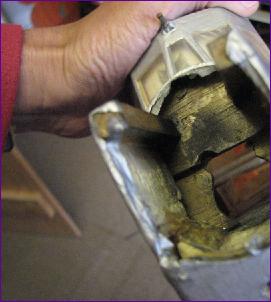 Removal of wheels, receiver, battery tray, control horns and pushrods was also very quick, then it was time to take the motor out. This was no great problem, but the sight that greeted me was something of a shock - I believe the phrase is "some evidence of brush wear"!
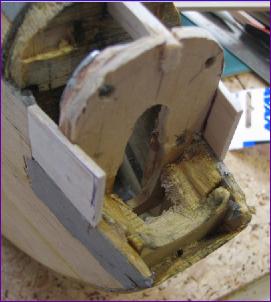
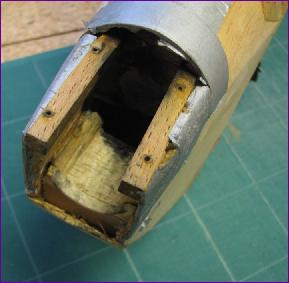 The more serious problem though was the totally different mounting requirements of the old and new powerplants. This picture shows the mounting beams used to secure the Olympus belt drive unit. The structure of this nose section already shows signs of butchery because the model was originally built with interchangeable power pods. When I settled on which powerplant I preferred, the pod was simply glued permanently in place with epoxy. With hindsight, this was perhaps not a good move!
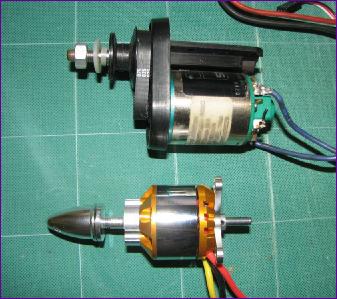
 I did consider dispensing with the cruciform motor mount in order to enable the new motor to be installed a little higher. However, this would mean that the mounting screws would have to be inserted from the rear of the firewall, and I could see no way of providing access to do this. In the end, I made a firewall out of 1/8in plywood, carved the top of it down as much as I dare and then hacked out enough balsa to enable it to be dropped into the nose far enough to align with the existing structure.
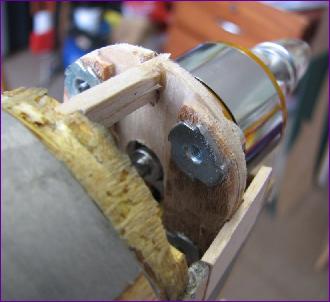
 In anticipation of this problem, I chose a motor that ought to be capable of flying the model on an 8in diameter propeller if necessary, compared with the 9in used to date so, if ground clearance does turn out to be an issue, all is not lost.
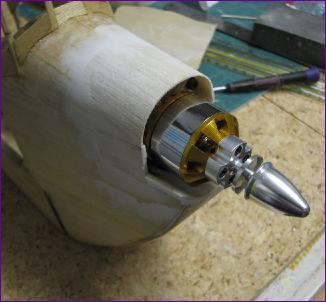
 Covering Up
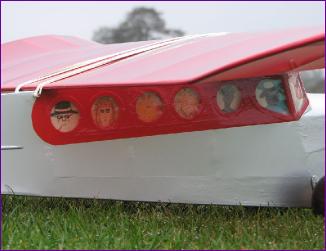 One roll of the red was enough for the wing and control surfaces (only just!), leaving none for the fuselage. This was just as well really since the fuselage structure bears the bulk of the battle scars and would not look at its best in see-through clothing. So the fuselage was done in silver, with an offcut of solid red, which tones reasonably well with the transparent colour, being used around the cabin windows to relieve it a bit.
 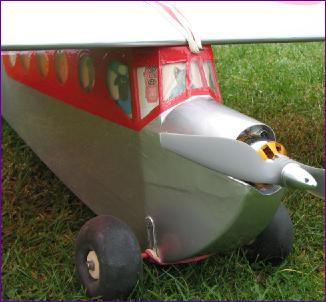 Early in the Lazy Bee's life, various members of the family each drew a character to peer through one of the many windows. A few well known cartoon characters completed the crew and it seemed only right that they should all continue to fly.