I started thinking about a subject for the 2015/16 building season quite early, and after some deliberation, decided that I would like to build a Flair Hannibal. I have nothing of this era in my hangar and can remember admiring a couple of these mock WW1 aircraft performing lazy aerobatics and touch 'n' gos.
Those were i.c. powered but of course mine would be an electric conversion. Also, at 91in span, I would want to build it with a two piece wing. It also occurred to me that it would make a good aerotow tug which should add an extra dimension to the project.
Then the problems started. Over the next two months or more, it transpired that there was no realistic prospect of Flair producing any more of these kits in the forseeable future and all attempts to locate one on a shelf somewhere came to nothing. However, during this searching I came across the Balsa USA kit for a Fokker Eindecker. This is slightly smaller than the Hannibal at 80in wingspan, but is very similar in character. A bit more seearching revealed that there seemed to be only one kit in the country so, still smarting from the disappointment with the Hannihal, I felt that an uncharacteristically prompt decision was called for and so ordered the kit.
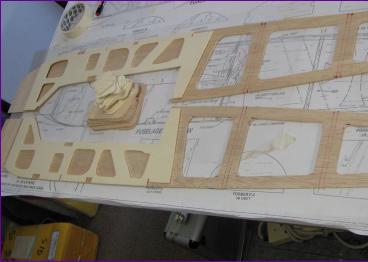
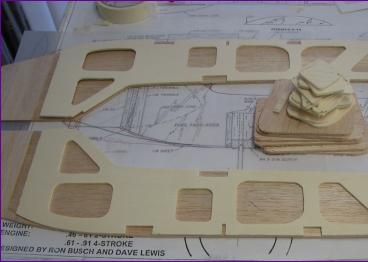
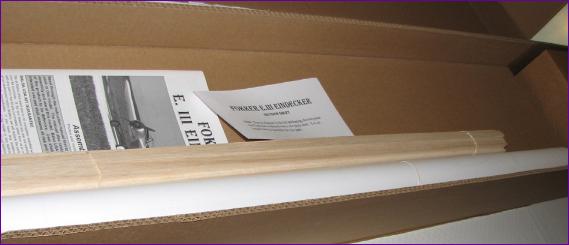
On opening the box, my first impression was that there had been a major packing error! The only visible contents were the rolled plans, an instruction booklet, errata sheet and a small bundle of strip wood.
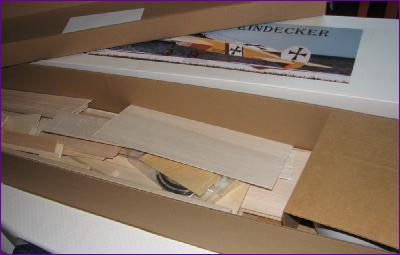
However, after a few seconds of panic, I realised that the box had a false floor. Removing this showed a much more hopeful array of parts.
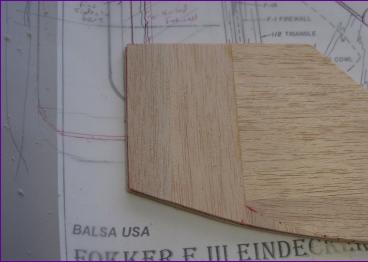
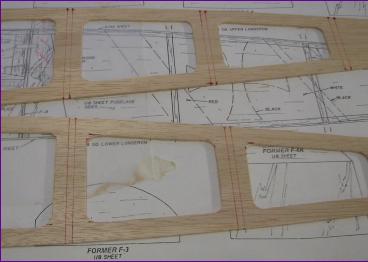
The box proudly proclaims "Quality AAA Balsa". Well, unless "A" is a hardness rating, I beg to differ. The wood is generally very heavy and the grades are inconsistent, with variations of over 2:1 in the weight of identical parts. On the good side though, the strip wood is straight and the die cutting is very clean, so it does look as if the kit should go together well.
I do try not to start a winter build before September but the early arrival of the kit, coupled with a less than brilliant English summer, presented a significant temptation. In the end, whilst I managed to restrain myself from getting out the glue and scalpel, I did unroll the plans and start contemplating various modifications.
Over the years, many people have 'kit-bashed' the Hannibal to make it into a more scale-like representation of an Eindecker. My mission was the opposite - I didn't want a scale build and so set about looking for areas where I could personalise the model, the aim being to keep the period feel but make it clear that it wasn't meant to be a representation of an Eindecker. Perhaps predictably, the project soon became known as the Neindecker!
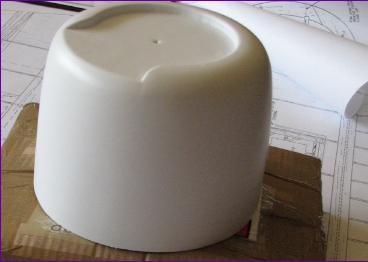
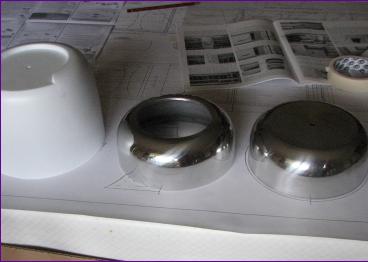
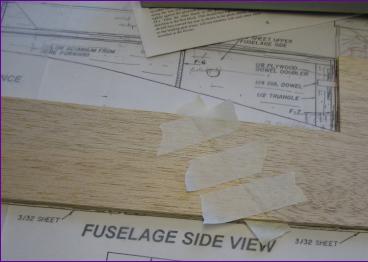
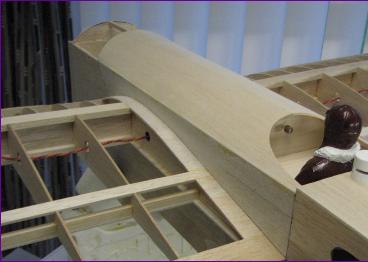
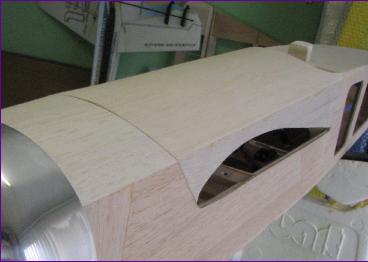
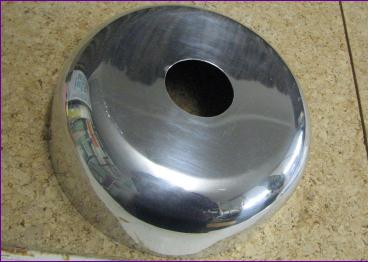
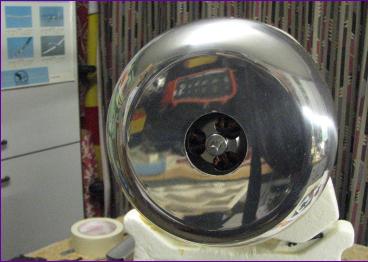
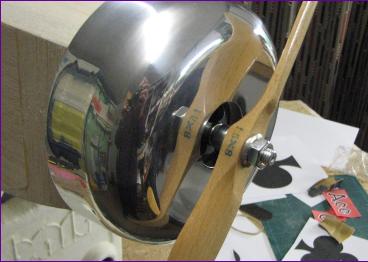
Apart from the electric conversion and aerotow role, there were a couple of attractive features of the Hannibal which were missing from the Eindecker, notably the triangular tail surfaces and the lovely aluminium cowl. The tail surfaces could be changed with a few strokes of a pencil and scalpel but the cowl issue demanded a little more research. After considering scouring the shops for a suitable saucepan, I eventually bought a cowl for a Flair Baronette (yes, there are a few Flair parts still available). Initially the wrong cowl was supplied with an open front. The photos show the differences between the three cowls and it is clear that the front end of the model will need to be re-worked considerably for it to fit. But then, it's not a scale model, so that doesn't matter at all!!
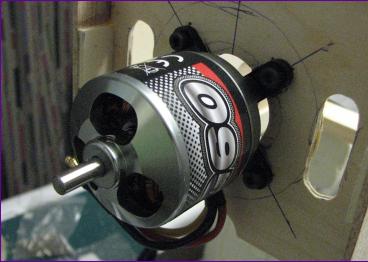
During this time, I also bought a few parts (motor, ESC, uBEC, pilot, tow release, wheels etc.) and contemplated other modifictations related to battery access, wing fixing, tow release and so on, but more of that during the build. Now though it's time to fast forward a bit. . .
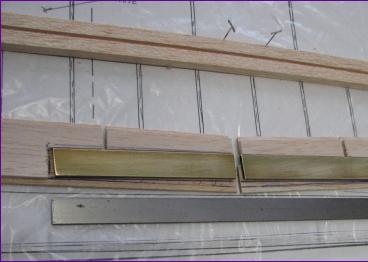
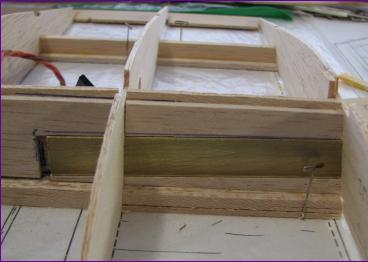
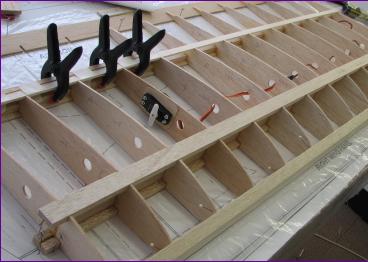
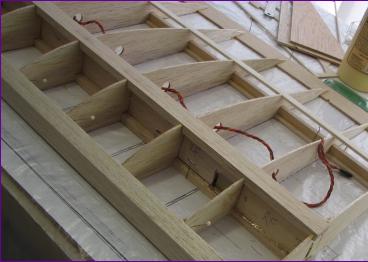
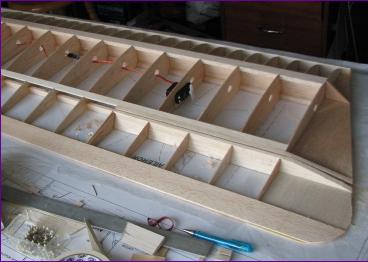
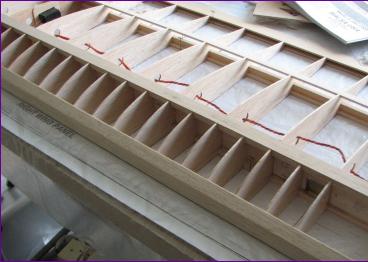
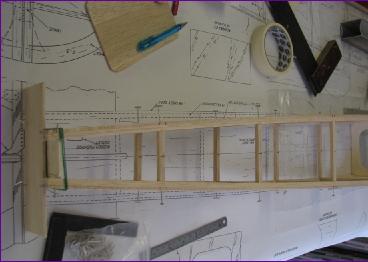
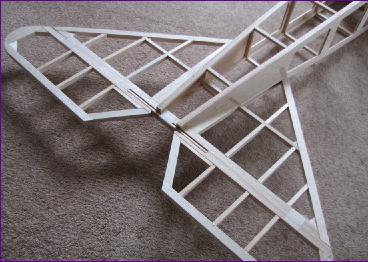
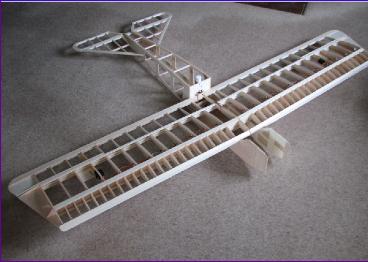
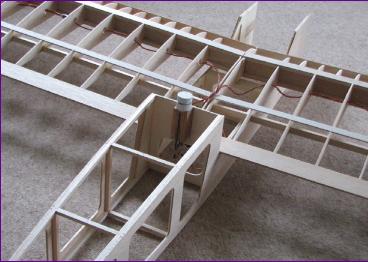
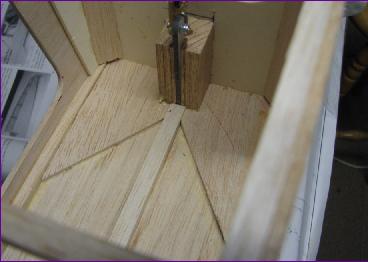
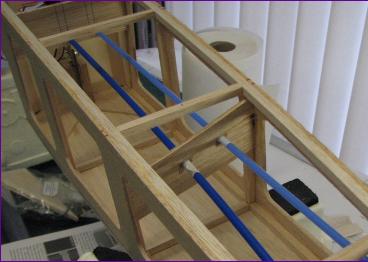
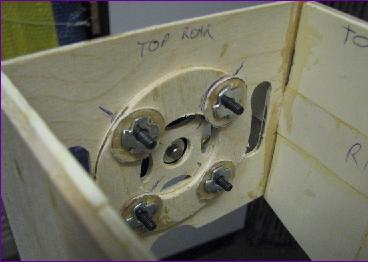
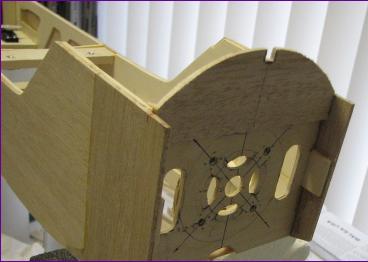
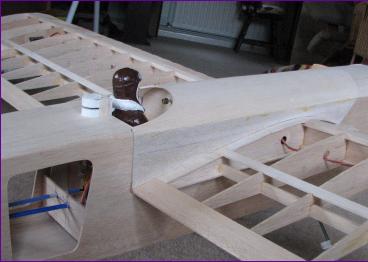
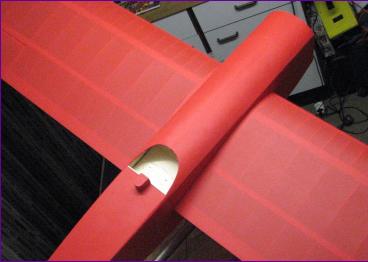
September 2015 Before starting on the construction of the wing itself, it seemed a good idea to sort out the areas where I was making changes. Although the Neindecker wing isn't as huge as the Hannibal's, I still felt that a two-piece arrangement would give me more transport and storage options, so pieces of 3mm balsa were cut to position brass joiner boxes at the appropriate dihedral angle.
A second balsa wedge secures the box in position then a 1/16in ply closing plate is applied to the first rib bay for good measure. The photos show dry fits before committing to the epoxy.
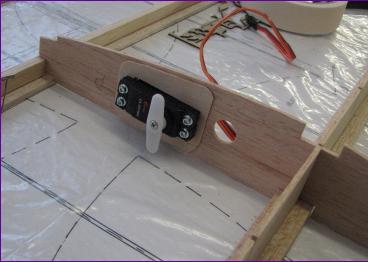
The only other modification to the wing construction was the mounting of the aileron servos. I opted for my prefered 'through the rib' method.
With these mods sorted, it was then a case of working through the construction more or less in the order shown in the book. I say 'more or less' because the book has you slot everything together then run cyano in the joints, whereas I prefer to use aliphatic resin and fit the parts as I go.
The parts all fitted pretty well, although of course R1 and R2 had to be re-worked somewhat to accommodate the joiner boxes in lieu of the dihedral brace.
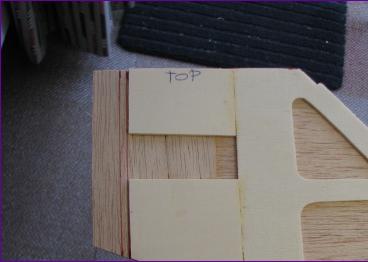
October 2015 Surprisingly, it only took a week to bring the second wing panel up to the same stage as the first one so then it was on to the fuselage. The first step was to join the forward and aft sections of the 1/8in balsa fuselage sides.
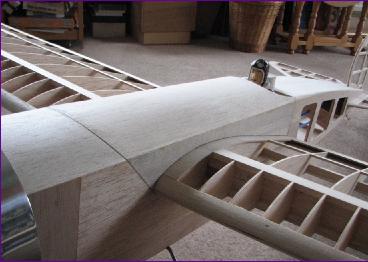
Because I will be using the much shorter Baronette cowl and also need to mount the firewall rather further forward than shown on the plan, the fuselage sides also needed extending at the nose.
I mentioned earlier that the wood is heavy. The balsa fuselage sides weighed in at 8oz so I decided it was worth fretting them out at the rear end. This reduced their weight by a not inconsiderable 2oz. The lite ply doublers weighed 4.5oz. A further fretsaw attack here shaved off another 1.5oz.
This simple measure has more than made up for the extra weight I will be adding with the aerotow release. It may not be significant in the grand scheme of things, but I feel better for having made the effort.
A couple of liteply offcuts were used to support the nose extension up to the back of the firewall. I've also trimmed 1/4in off the top of this nose section because of the smaller diameter of the Baronette cowl.
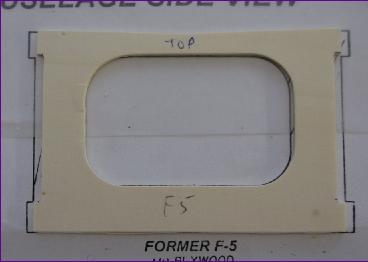
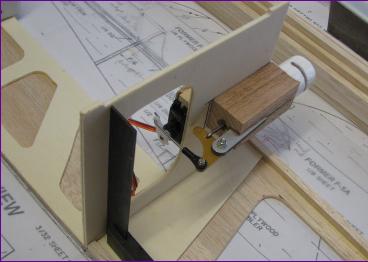
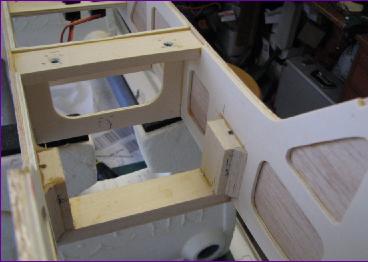
Another consequence of the smaller cowl is that the fuselage needs to be slimmed down a little so the two ply formers F5 and F7 were re-worked accordingly. Before beginning the fuselage assembly, it also seemed prudent to sort out the fitting of the tow release to the back of F7 and the operating servo on the front.
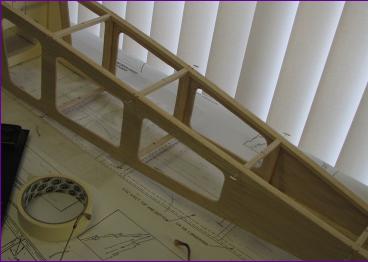
The fuselage sides are then joined on F5 and F7 in the usual way, then the rear end is pulled in and the 1/4square cross members fitted.
At this stage, the basic fuselage fromework is going together very smoothly with no unwanted bows or twists developing. Here's hoping that this continues to be the case!
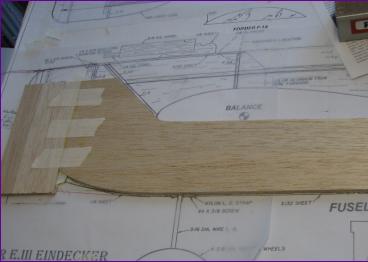
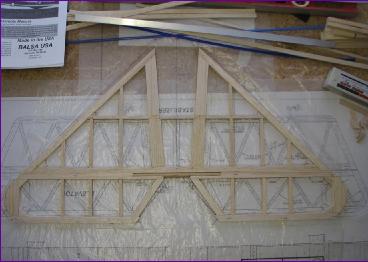
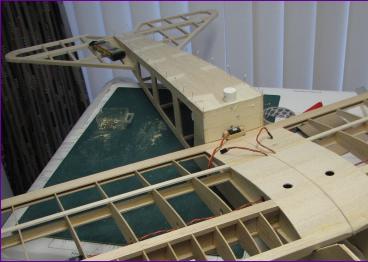
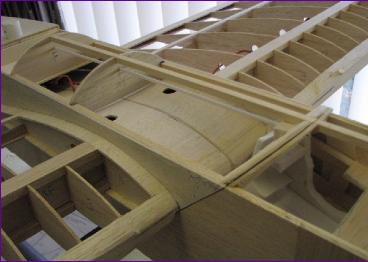
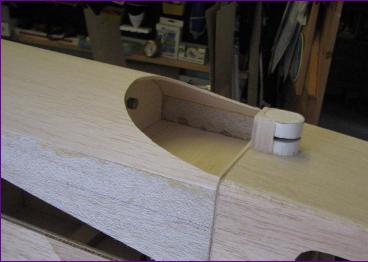
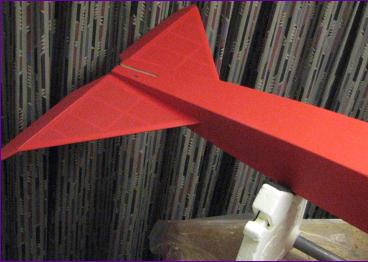
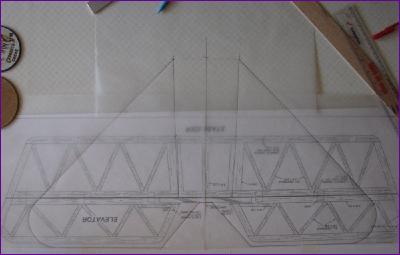
One of the features that I liked on the Hannibal was the triangular tailplane so I decided to incorporate it into this model. Apart from anything else, it should make it clear that it isn't an Eindecker! I also pulled in the tail ends of the fuselage sides rather more tightly than on the Eindecker, then set about re-drawing the tailplane. I was able to use the wood supplied in the kit and also, by positioning a spar where the leading edge of the original tailplane would have been, the triangular version slides into the pre-cut slots in the fuselage sides, just as the designer intended.
I've tried to keep the area of the tailplane and elevators pretty much the same as the originals so hopefully this mod won't affect the flying characteristics too much.
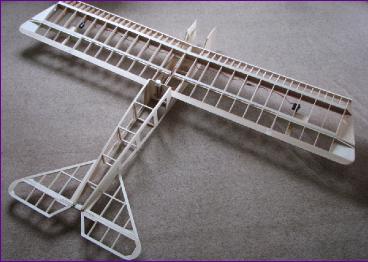
So that's it for October. The model is taking shape, albeit a rather flat shape at present. Maybe I'll build the fin and rudder next - just have to decide whether to stick with the round shape or 'triangulate' it to match the tailplane.
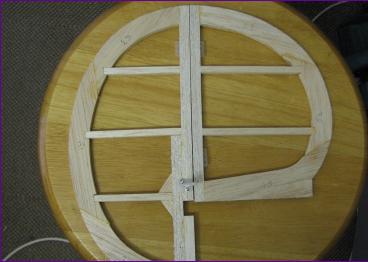
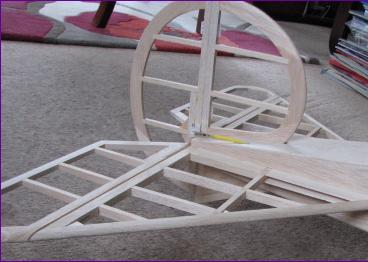
November 2015 As you can see, I opted to stick with the round shape for the fin and rudder. I was tempted to laminate the outline but fitting the diecut parts together brought back fond memories of Keil Kraft kits of the 1950s!
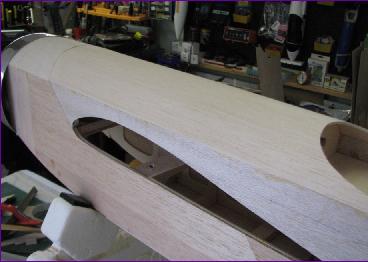
Next it was time to sheet in the top of the fuselage. I sat the wing on the fuselage for this and also temorarily fitted the tailplane. The battery resting on the tailplane is to correct a slight twist to the fus to bring the wing and tail into alignment.
The tow release is probably going to be subjected to a few sharp snatches, so some reinforcement under the top sheeting seemed like a good idea.
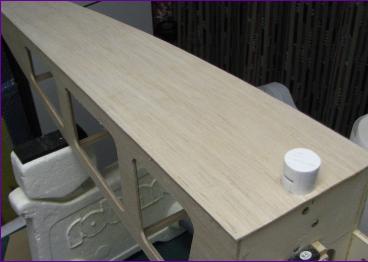
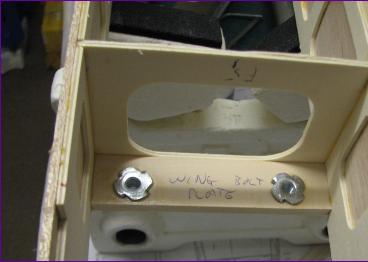
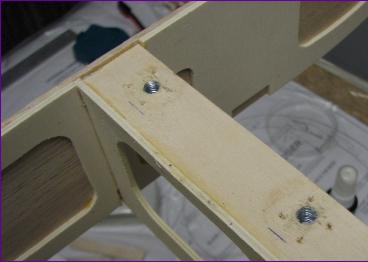
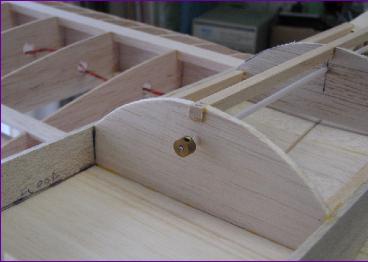
The wing fixing was sorted out at this point. The instructions tell you to tap a thread directly into the basswood mounting bar to take the nylon bolts. However, I opted to fit 6mm captive nuts in the usual way.
Next up - control linkages followed by the undercarriage mounting. No snakes or pushrods are provided so I used a nylon snake for the rudder but, since I find these to be a bit temperature sensitive, fitted a 2.5mm carbon rod down a snake outer for the elvator, in the hope that this will hold the trim setting better.
The undercarriage is a conventional torque rod arrangement, fitting into pre-grooved basswood blocks. However the grooves in the vertical blocks were not offset as stated in the instructions and the groove in the main mounting block wasn't wide enough so a fair bit of fiddling and fettling was needed.
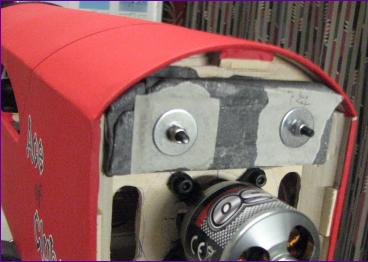
The firewall and motor mount was next on the list. Because the kit is designed for i.c. I had to extend the nose considerably so this really was a make it up as you go exercise, particular care being needed to ensure everything would line up with the smaller Baronette cowl.
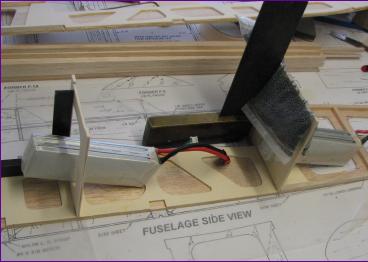
Battery stowage was another area of improvisation, particularly since I'm still not sure whether this model will be flying on 6, 7 or 8 cells. I had hoped that it would be possible to balance the model with a 3s x 3300mah LiPo in the nose so that a second 3s or 4s pack could be positioned over the cg to avoid any cg shift when adding a bit more oomph for aerotowing.
However, a trial balance showed that, even with both battery packs tight up against the firewall, the model is still going to need lead up front. Bit of a disappointment, that.
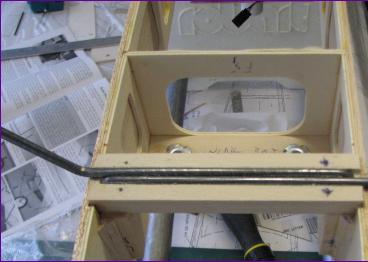
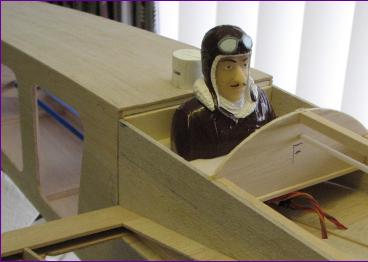
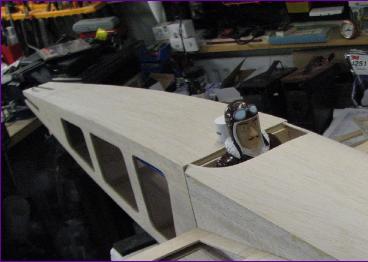
Anyway, with the battery stowage more or less sorted, the last major job of the build was the top of the centre section of the fuselage. As designed, this section is of course permanently glued to the one piece wing but, since I have a two piece wing and also need access for battery changing, it becomes an overwing hatch. The picture sequence shows how I tackled it, including a remote release bolt, operated from the pilot's cockpit. That cockpit has also been moved back to the trailing edge of the wing so that the tow release can be somewhat disguised as a pilot's headrest.
There seemed to be more work in this hatch than in the rest of the fuselage build, but I must admit that I am rather pleased with the finished product.
So, three months in, the build is basically complete. The Solartex is ready so, after a few more days of sanding, filling and generally tidying up, it will be time to get the iron out.
December 2015 I don't see the point in taking a lot of photos during the covering process Suffice it to say that most of December was taken up with ironing. This is the first model I have covered with Solartex and I found it very easy to work with.
One of the jobs that I wasn't looking forward to was opening up the hole in the aluminium cowl. After taking lots of (conflicting) advice, the job was finally tackled using a hacksaw with an Abrafile blade fitted. It wasn't something to be hurried, but in the end went pretty well. I may open up more holes or maybe add some stickers later but at least the motor should be well cooled now.
Covering proceeded steadily, the tailplane being covered in situ, whereas the fin, which is to be white, was covered before being glued in place.
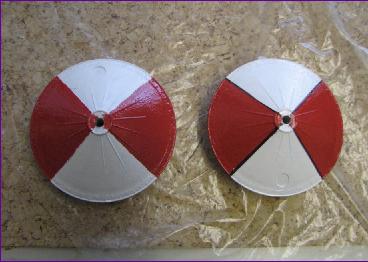
Another task that had to be tackled was the painting of the wheels. My ability to make a pig's ear of anything involving paint is legendary so this was embarked upon with nearly as much trepidation as sawing the hole in the cowl.
My attempts at a straight boundary between the red and white did not turn out well, as can be seen on the first wheel in the picture. However, a few moments with a ruler and a marker pen sharpened things up a bit.
The instrument panel was printed from a photo found online and the cockpit edged with rubber tube supplied with the kit. Dick Dastardly seemed like a suitable choice of pilot for this model.
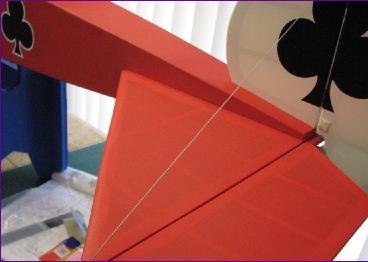
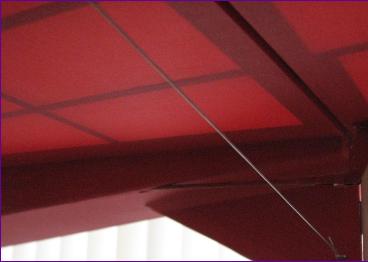
Because the Neindecker is to be used for glider towing, some close loop trace was added around the tail to try to keep the towline clear of the fin and tailplane.
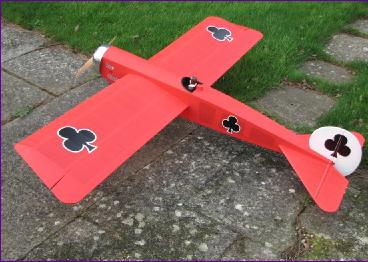
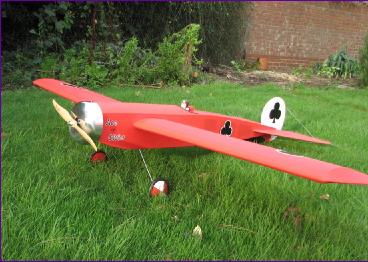
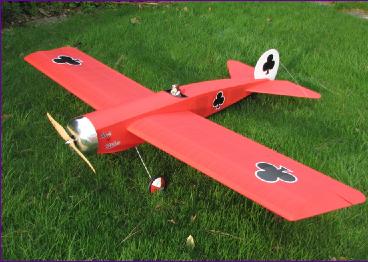
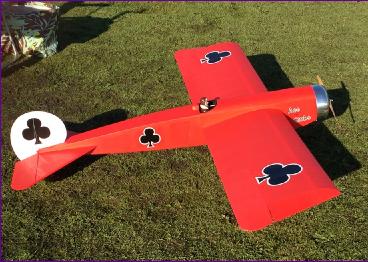
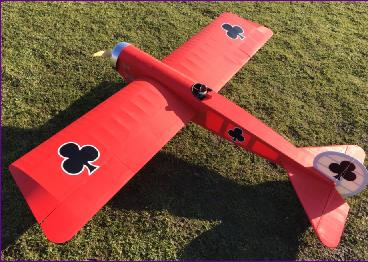
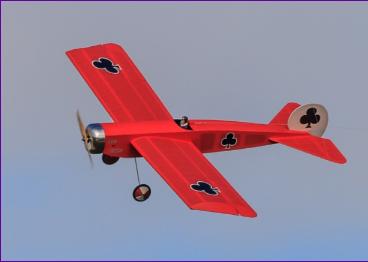
As mentioned earlier, I wanted to de-militarise this plane, whilst keeping the character of the era. After some discussion with Tim Calvert (Modelmarkings.com), the German crosses were replaced with Ace of Clubs logos and the model named accordingly.
With the model essentially finished, it was assembled for a final balance check. Even with a 3s and a 4s 3300mah LiPos pushed up the nose, I needed to bolt a full pound of lead to the firewall to bring the cg anywhere close to the mark on the plan.
This brought the all up weight to a porky 91b 8oz which makes the box weight of 7.5 - 8lb look a trifle optimistic! Still, the wing loading works out at only about 20oz/sq ft. so hopefully all will be well.
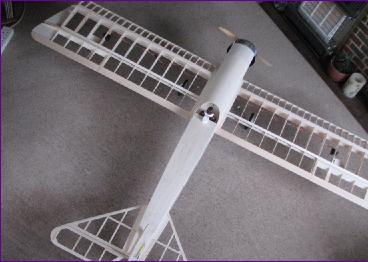
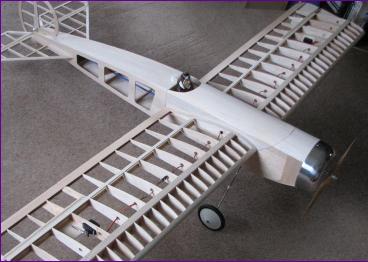
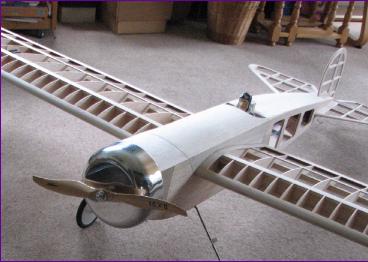
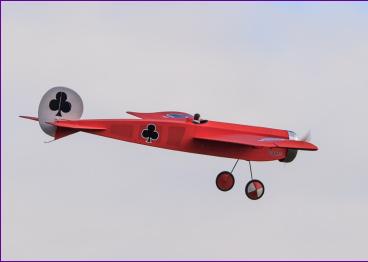
With the radio, ESC and sBEC installed, the radio was programmed and the model taken out into the garden for a test run of the motor and a few pictures.
So, as 2015 draws to a wet and windy close, the model is basically ready to go. Here's hoping for some long-overdue flying weather in the new year.
January 2016 Well, the hope for decent flying weather remained largely unfulfilled! However, with a few other intrepid clubmates, I did venture to our temporary, half flooded, flying field one frosty morning. Crunching through the icy shallows to a higher bit of ground, we managed a pleasant morning's flying. With those skinny wheels supporting 9.5lb, I didn't fancy trying to land on muddy slush so, as soon as the ground began to thaw out, it was now or never for the Neindecker.
The usual checks were carried out a couple of times and then it was lined up into wind and the throttle opened. Take off was smooth and steady as indeed was the whole flight. A few clicks of elevator trim were all that was required and control response was positive and progressive. Considering that the model felt very stable in pitch and very reluctant to stall, I was surprised to find that a shallow dive test showed the model in no hurry to pull out, suggesting that the cg was, if anything, slightly rearward. Notwithstanding this finding, I took a little of my extra lead out for the second flight with no detectable change in behaviour. It may be that the apparently neutral behaviour in the dive test is due to the long tail moment rather than a rearward cg so I shall continue exploring this feature when I eventually get to fly the model again. The model carried the extra weight with no problems and landings can be as slow as you want.
On the basis of this promising start, I have declared the glider towing service open for business!
No flight pics on this occasion - maybe next time.
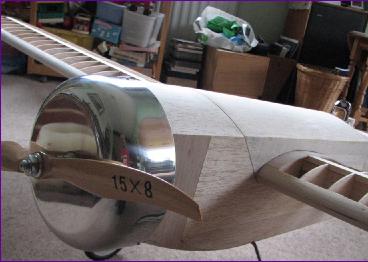
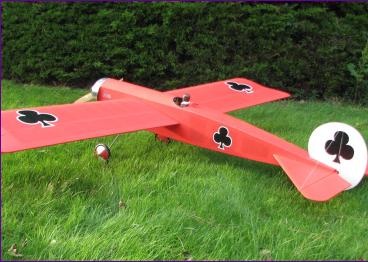
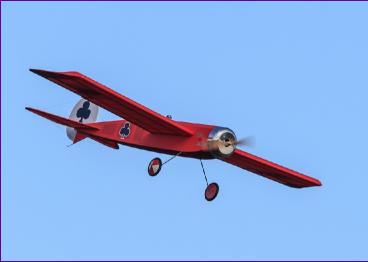
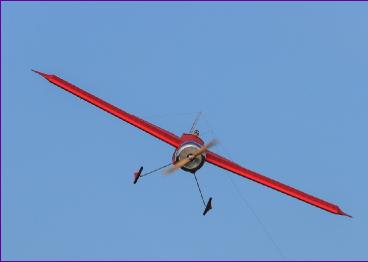
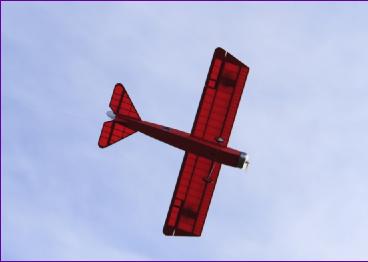
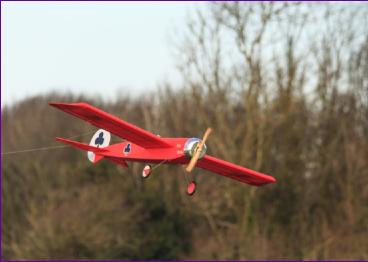
February 2016 The Neindecker has had a further seven flights spread over three outings this month, including four aerotows. The in flight pictures here were taken by Alan Butterworth during the first of these flights and the towline is clearly visible in some of them. Unfortuately, a noseover on landing broke the prop, bringing that day's proceedings to an early close. However, replacing the Turnigy 15 x 8 with a Zinger 14 x 10 produced almost identical performance figures and a considerable improvement in duration so, since I already have a spare one of those, it turned out in someways to be a happy accident.
The model tows a 2.5m Flair Sunrise with plenty of power to spare but we found that the speed had to be kept down otherwise the Sunrise, being a slow flying rudder/elevator model, would become unstable due to Dutch roll. Hopefully now that the model's credibility as a tug has been established, someone might put a tow release into a slightly heavier aileron-equipped glider, then we should get some interesting video.
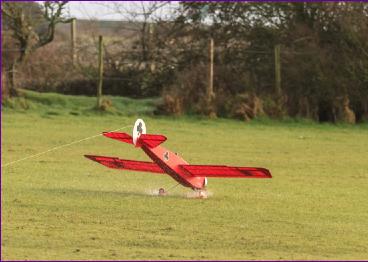
An ignominious picture to end on perhaps, but the model was in no way to blame. I brought it in too fast and on the rollout it encountered a waterlogged patch of the field - you can see the water splashing up around the wheels.
This will probably be the last diary entry, but I will update the gallery pages and add video clips as and when they become available.
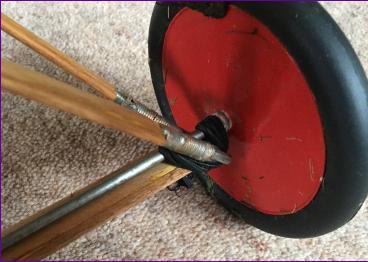
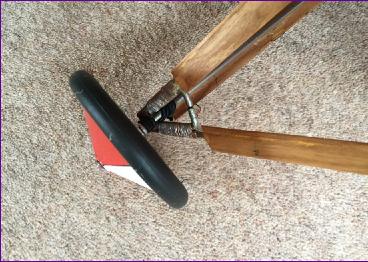
Postscript: December 2016 As you can see from the pictures, the stock undercarriage is spindly in appearance and has proven over-flexible in use. So I commissioned a suitably skilled clubmate to do some soldering for me and the model now sports this rather nifty bungee-sprung setup. This makes touch and gos much more rewarding but you do have to remember that the u/c can no longer straddle obstacles such as a large molehill or cowpat!
Subsequent to this modification though, flying this model over the Summer became a rather frightening experience. We were now back on our usual field - much smoother but a bit smaller, and for some reason the Neindecker just wouldn't roll to the right. This had not been an issue before the switch of undercarriage and flying venue and I was perplexed. For a while I was convinced there was an intermittent servo or wiring problem but I couldn't find anything and then as I struggled to straighten up after a left turn, the model flew a close straight pass down the field and I could see that both ailerons were fully deflected but the Neindecker was flying straight as a die!
I spent three months chasing down spurious causes such as temperature induced rudder trim changes, the extra weight or cg shift caused by the undercarriage swap, but each time I thought I had the problem solved, the model would lock into a left hand spiral (not a spin) and seem to refuse to come out even with full opposite aileron and rudder. Three times it got to the point where I resigned myself to it crashing but on each occasion it suddenly responded at the last moment. Eventually I realised that this could not be just lucky coincidence and asked myself what happens just before a crash that might be triggering the recovery? Of course the answer was I pulled back on the throttle. A few moments more cogitation and the penny dropped - following that prop breakage back in February, I had replaced the Turnigy 15 x 8 prop with a Zinger 14 x 10. This, I thought, had turned out well - the current draw and rpm were identical but the duration had improved remarkably, indicating that the Turnigy prop had been very inefficient. What I hadn't realised was that the coarser pitch Zinger apparently mainains its torque rather better at flying speed and it was this torque reaction that was overpowering the ailerons.
Armed with this new insight, I fitted a few washers to provide a bit of right sidethrust and swapped the prop for a Zinger 14 x 8 and Bingo! normal service was resumed. The model is now once again a docile, viceless everday flyer rather than an untameable monster. After three problem-free outings, I am now really beginning to enjoy it again - especially those beautiful right hand rolls and touch and goes!
 Apart from the electric conversion and aerotow role, there were a couple of attractive features of the