One of the challenges we face when converting a plan, kit or ARTF model from i.c. to electric power is how best to mount the motor. There is no one best answer, but hopefully the examples described below will help you to decide which approach might work best in your latest project.
Firewall Mounting
It doesn't get much easier than this. A brushless outrunner motor with a rear mounting kit bolts straight to the firewall. You might need to move or extend the firewall forwards, but that's about it.
Full Custom
By contrast, just occasionally, it can get really complicated! Best to think about mounting issues before choosing your gearbox.
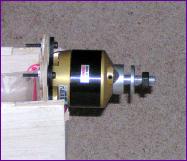
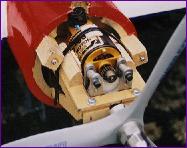
Mounting Box - 1
For front mounting a motor to the firewall of an ARTF, building your own mounting box is one way to ensure that you get the thrustline spot on.
Click picture to enlarge.
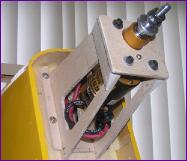
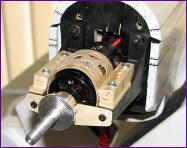
Mounting Box - 2
A variation on the box theme, with aluminium fixing rails and the motor mounted above the thrustline. Note the addition of baffles to direct cooling air over the motor.
Click picture to enlarge.
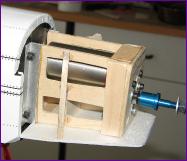
Beam & Plate - 1
Bored with building boxes, when I had to do the second retrofit in the Cub, I opted to use the i.c. mount.
Click picture for more details.
Beam & Plate - 2
In this variation the gearbox is secured to the bottom of the mounting plate, and the motor supported on balsa wedges.
Click picture to enlarge.
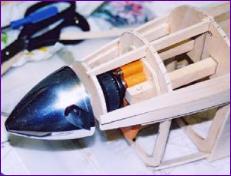
Beam & Tube
Another retrofit, using the i.c. mount. A screw through the front plate into the motor prevents rotation whilst a lip of ply around the inside of the tube takes the thrust load.
Click picture to enlarge.
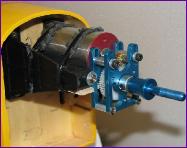
Tube & Bulkhead
And one last permutation. In this case (the Stearman), the tube not only holds the electric motor but also acts as the mounting for the dummy radial engine.