The P38 has always held a certain fascination for me ever since I built an Airfix model of it as a schoolboy. Having built my hand launched version back in 1997 (24 years ago, at time of writing!), I've fancied the idea of a bigger one with retracts etc. I never found the right set of plans to turn this dream into reality and, as the years went by, I'd more or less come to terms with the fact that it probably wasn't going to happen. So when I came across rave reviews of this ARTF foamie version, when we were deep into the depressing winter of Covid 19, I thought 'Why not?!"
There's a full build video available of this model on the MotionRC website and an extensive thread on RCGroups, so this is not so much a review as a few comments on the model and its assembly.
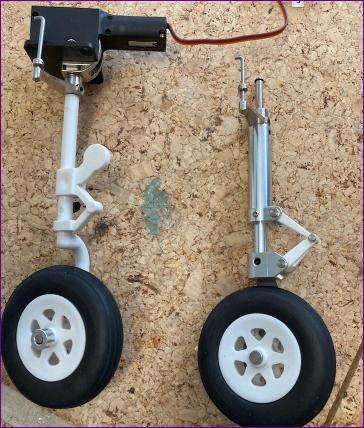
In its stock form, the undercarriage legs are not sprung. Taxiing models with rigid undercarriages over lumpy grass never looks very good so I bought the optional upgrade pack and decided to get this upgrade done before assembling the model.
Swapping over the main gear legs is straightforward - the grub screws securing the legs in the retracts thankfully released without difficulty.
The nosegear upgrade is though a more involved job. Extracting the retract unit is complicated by the nosegear steering linkage and then, to swap the leg, the retract unit itself has to be dismantled. There then follows the tricky job of removing the retaining circlip and replacing it to secure the new leg.
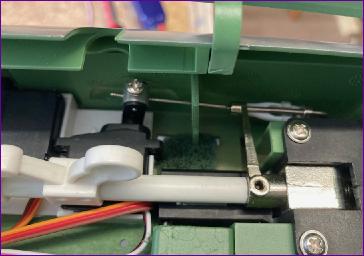
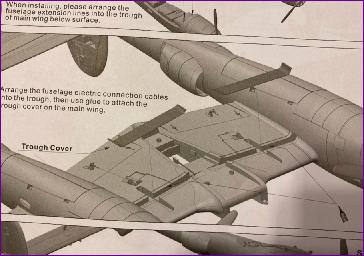
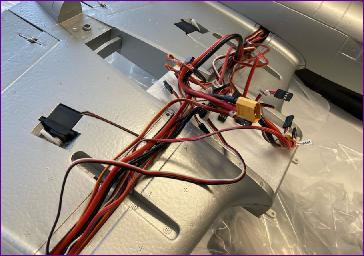
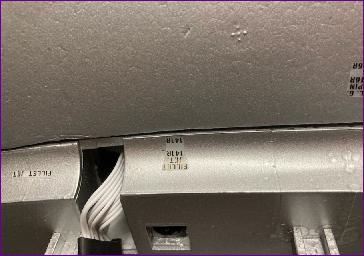
Assembly of the airframe itself is very straightforward - most of it is just screwed together. The wiring though is a different matter entirely. The instructions are at best useless and at worst positively misleading on this aspect of the build. Compare the picture in the manual (below left) with the reality on the right!
In some senses, the wiring is well thought out inasmuch as there is a magic 'blue box' which takes care of the gear door sequencing and some of the power distribution and Y lead functions. Even so, with a total of 13 servos, three retracts, two ESCs and a selection of LEDs, there was always going to be a lot of wires. A bespoke wiring harnesss, allowing the power lines to the various servos etc., to be shared, would have cut down the bird's nest considerably and some of the supplied wires could do with being an inch or two longer too, to enable the receiver and blue box to be properly installed rather than buried in the tangle.
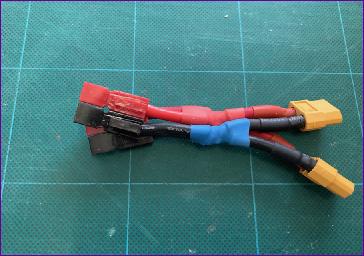
The last step in the wiring was to make up an adapter lead to mate with my preferred Anderson Powerpole (aka Sermos) battery connectors. This 'X' lead also keeps open the option of using two 3000mah batteries in parallel as an alternative to the single 5000mah pack.
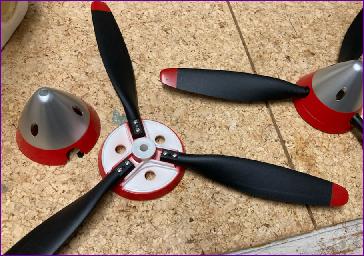
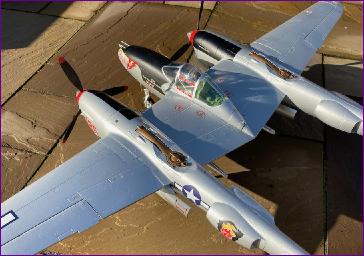
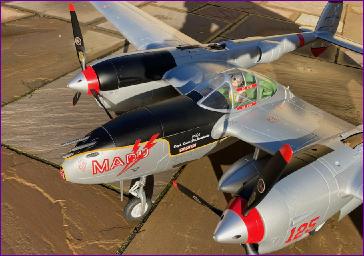
The individual propeller blades are screwed to the plastic spinner backplates and there have been reports of blade-shedding incidents in flight, which generally did not end well. The spinner backplates have since been beefed up a bit in later models so I'm hoping that they will hold together okay. Once assembled, they certainly look the part and the waterslide decals provide a nice finishing touch. These decals too have reportedly tended to depart in flight so I applied a coat of clear varnish over them in the hope of keeping them in place.
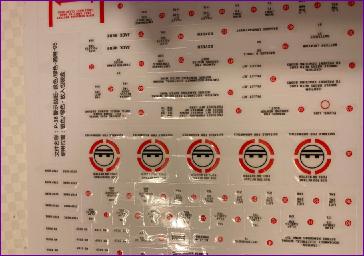
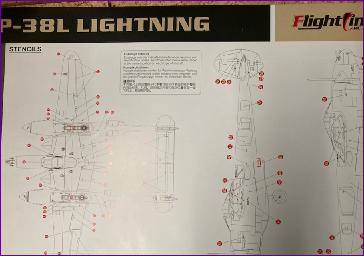
Talking of decals, applying these is probably the most time-consuming part of the whole build. The major decals don't take too long (although working out which ones apply to your choice of livery can be a bit confusing). However, you are then faced with a rather extensive and daunting sheet of decals for all the various stencilled instructions that are all over this aircraft.
Fortunately a diagram is included showing where these have to be applied which, give or take a few errors, is very helpful. I did apply most of these but to be honest, individually, they do look rather 'stuck on' and aren't all that convincing. The overall effect does though make the model look a bit busier so maybe they are worthwhile.
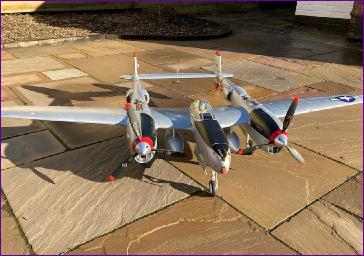
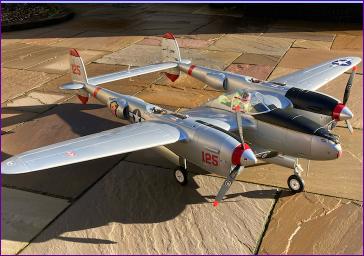
With the build completed and no immediate prospect of getting to a flying field, the best I could do was to take the assembled model out into the garden for a few pictures.
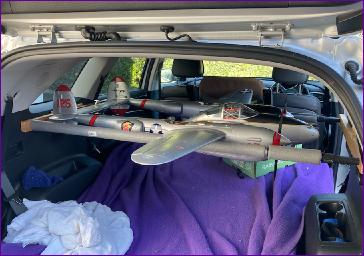
The outer wing panels of the model are secured by a couple of screws so my plan was to remove them for storage and transport. However, somewhat to my surprise, when offered, fully assembled, up to the rack in the back of the car (a Kia Sorento), it sat very securely between the padded poles.
So, the wing panels look like staying on permanently and the model has been allocated a space on the garage wall where it can sit, ready to go - just as soon as the current Covid restrictions can be eased enough for it to be taken out for its maiden flight. After which, I'll try to come back and provide a further uipdate.
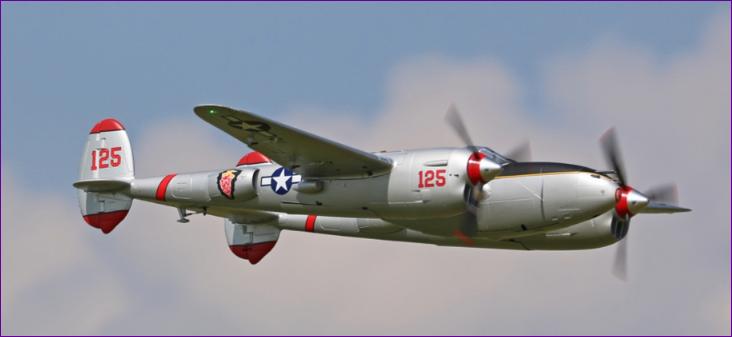
Well, three months on, the P38 has at last flown. Thanks to Chris Williams for this splendid picture. To be honest, I have very little to report. In spite of it being so heavy, the model flies really well and certainly looks the part in the air. I've had four flights with it so far and the landings have been straightforward, the sprung legs making taxiing very smooth on our grass field. I've only done one flight with the drop tanks fitted and, whilst it was no problem, I did feel that it handles more sweetly without them so they will probably be left off in future. All-in-all, another well sorted model showing how much the humble 'foamie' has developed over the last few years.