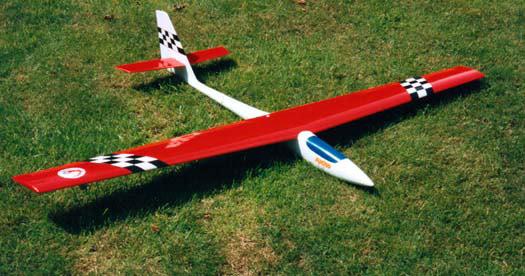
Multiplex Akro
Kit Review by Trevor Hewson (Originally written in 1992 for 'Sloping Off', the Newsletter of the Christchurch and District Model Flying Club) As well as introducing a number of new designs this year, Multiplex at last seem to have solved their UK supply and distribution problems and many old favourites are once again readily available. To look at, the Akro is a pretty, but unremarkable 71" shoulder wing kipper, with strip ailerons and a mid-mounted, all-moving tail. However its thin wing section (exactly what the section is seems to be a well kept secret) gives it an impressive turn of speed and, until the advent of models like the Arcus and specialist F3B and F3F models, it was one of the fastest models seen on the slopes. It also is reputed to have a good light air performance and as I had for years been looking for a replacement for my venerable Middle Phase, when Christmas 1991 came and the Akro reappeared on the market, the decision was obvious. The Kit Having removed the wing and fuz from the box it looks rather empty. However, lurking in the corners are a moulded epoxy/glass canopy, a veneered foam rudder, piano wire snake inners, a bundle of balsa strip and a few die cut ply and balsa parts, as well as the usual 'bag of bits'. As always with German kits there is a comprehensive "Stückliste" and, in checking this, one realises that this kit is very comprehensive indeed, literally needing only glue and covering materials to complete. And of course a receiver. And battery. And a switch. And four, yes four, servos. And I've run out of epoxy. And I promised myself I'd invest in some Perma-grit tools for the next model. And.... Construction The leading edges, which used to be ready fitted and shaped, are now supplied as balsa strip. This strip is commendably hard, but in my case was somewhat banana shaped, and although generous in section, one piece had to be quite deeply notched at two inch intervals to enable it to be straightened sufficiently. Most of the work on the wing, though, relates to the ailerons. Once freed from the wing, these took on an alarming twist. However, with judicious use of the kettle before applying the facing strip, it was possible to persuade them to align reasonably well with the trailing edge at root and tip. I was also surprised to find that the torque rod channels were not cut quite accurately, and , whilst the quality of the wing as a whole is excellent, I felt that this particular example fell short of Multiplex's usual standards in a number of minor ways. In the fuselage, the only real work is the installation of the tailplane crank and the servos. The markings for the tailplane proved very accurate and the ply servo plate was also a good fit. The only problem I had was with the snake outers - one was stuck firmly to the fuselage side well into the nose, and every time I tried to prise it free a bit more broke off! Eventually I hit on the idea of inserting the piano wire inner and tried again - success, and with just enough outer left to anchor it to the appointed former - phew! Getting the Gear in The aileron servo is shown mounted in the wing, and a cut out is pre-formed. However, this cut out is very shallow due to the thin section and so I opted to mount the servo in the fuselage, attaching the pushrods with ball links. Using a JR servo with my Futaba gear meant I didn't have to resort to the dreaded reversing switches. Murphy's Laws of Aeromodelling -1 "The number of pinholes in the Gel coat is independent of the number that have already been filled." However, I eventually gave up and applied a white top coat to the fuz, blue to the canopy and red Profilm for wings and tailplane. Very simple, but with the addition of the supplied chequers on wings and fin, the overall effect is quite pleasing if not exactly original. Time from purchase to completion - seven months! There's not a lot of work in building the Akro, but what there is is worth taking care over. Even so, three weeks of evenings or two wet weekends really ought to be enough. It's just that a few other things seemed to get in the way! In the Air
|
||
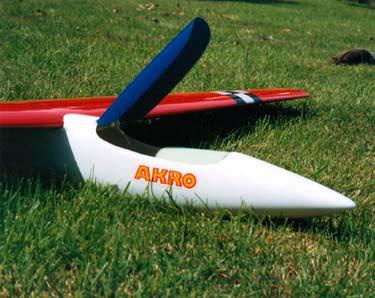 No problems. The rudder and elevator servos sit side by side, with plenty of room in spite of a very slim looking fuz. The servo plate provided also has markings for the switch and the canopy servo. The Akro is the only model I know of that uses an opening canopy as an airbrake. The canopy itself is a simple moulding, which fits perfectly and, with careful setting up, the system works well, closing firmly with no load on the servo in the fully closed position. With the canopy closed and the wing in position it is, though, impossible to reach the switch, so if, like me, you don't like externally operated switches, it's a case of open the canopy before fitting the wing - or prepare to get very frustrated! I eventually compromised and drilled two small holes in the sides of the fuselage and installed guide tubes so that the switch can be operated with a piece of piano wire.