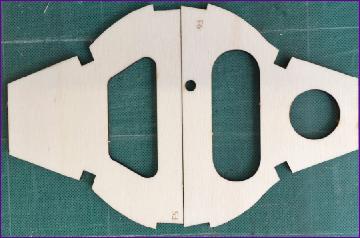
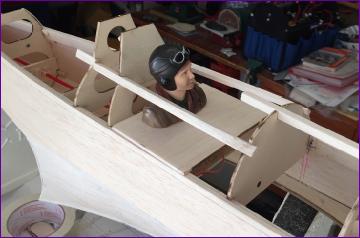
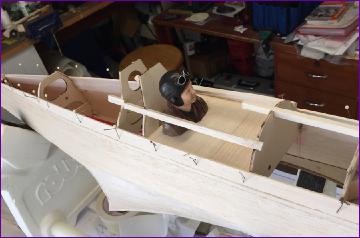
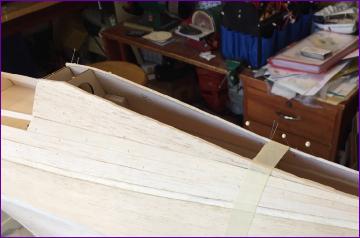
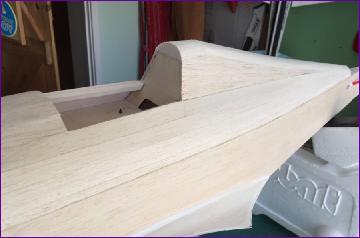
August 2018 (Click here to return to part 1) Construction of the top of the fuselage didn't get off to a good start. The first photo below shows the two formers which fit behind the pilot, F5 and F6. As you can see, F6 is wider at the base, even though it fits behind the sloping F5. It appears that I am the first builder to encounter this issue so I can only guess that this fault was introduced when a few other minor former inaccuracies were corrected. Anyway, it is no big deal and, after a bit of judicious sanding, the upper formers were soon fitted. You can see in the second picture that the slots in F6 for the cockpit side rails also seem to be slightly misaligned. Again, not a big problem but a bit of a puzzle as to how it happened.
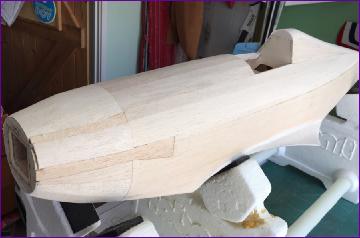
Then it was on with the planking. This was done in 3/32in balsa and, although not a quick job, it was pretty straightforward and I'm sure it was less stressful (both for me and the balsa) than grappling with the ammonia treatment.
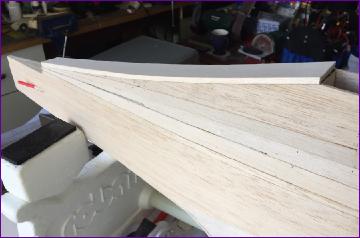
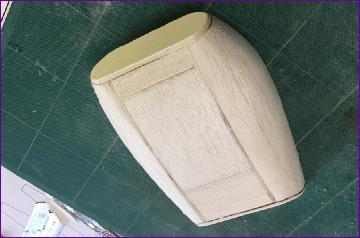
Once the side planking was complete the rear end was 'topped out'. As you can see, there's a bit of a curve to this top plate so I made it from two laminations of 3/16in balsa rather than attempt to bend the fairly stiff 3/8in sheet I had in stock.
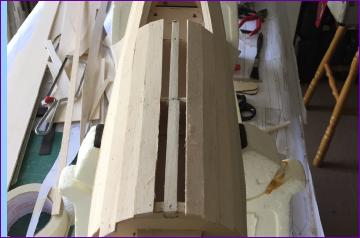
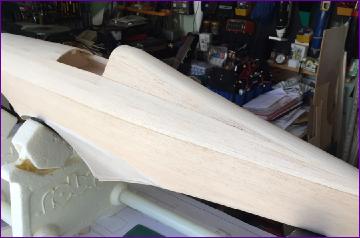
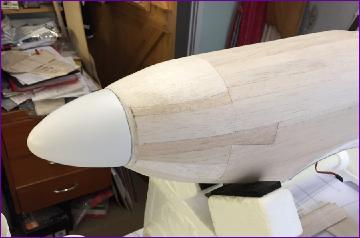
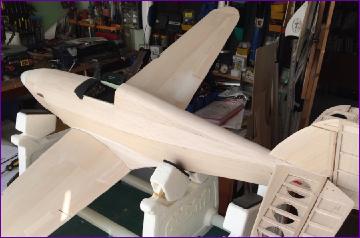
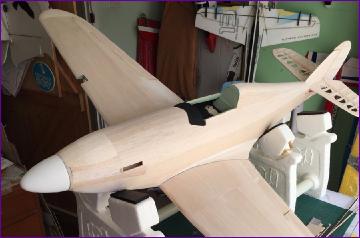
Although the front upper section is almost cylindrical, I was into my stride now and had a fair amound of 3/32in balsa left over so it too got the planking treatment. Then the nose section was blocked in and it was time to head out in the sunshine for a major sanding session.
One advantage of my deciding not to make the trek up to the Great Orme for the PSSA's mass hurricane fly-in is that those who are planning to be there have been pushing on with their builds slightly ahead of me. At this stage a few people had begun to express concern about the amount of lead they were needing in the nose to balance the model, one builder quoting a figure of 1lb 12oz!
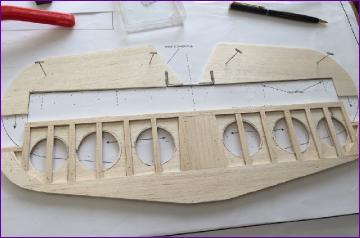
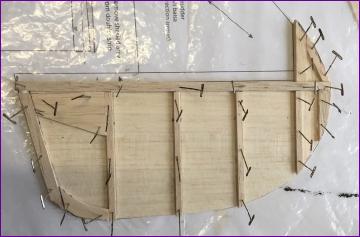
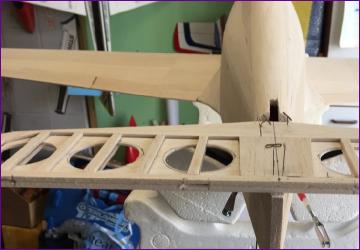
I've never been a great fan of solid sheet tailsurfaces. To avoid excess weight (which you pay for five times over with lead in the nose), the wood has to be very light and that in turn means it is vulnerable to hangar rash. This may be less of an issue if you plan to cover it in glass cloth but I'm intending to use film which offers very little ding protection.
So, one way or another, I persuaded myself to ditch the 6mm sheet provided and instead build up the tail surfaces, following a scheme put up by one of the other builders.
At the end of the day, I'm not convinced that the built up approach has really saved much weight. However, it should look better when covered and the 1/16in balsa used for the cores is harder than the 6mm supplied in the kit. If the words "Post-event rationalisation" spring into your mind then all I can say is:
1. How dare you!? 2. Congratulations on your erudition!
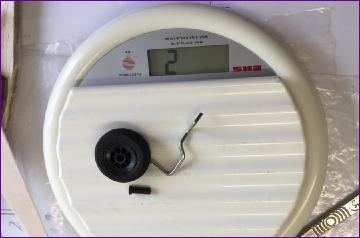
Getting back to weight saving though, I was really pleased to dig out this ultralight wheel, supplied with a foamie EDF, enabling me to make up an assembly weighing only 2g. (yes, I know the photo is upside down but two grams is two grams either way up!)
So, having tried my best to save weight at the rear end, attention was now turned to how best to add it at the front. The first step was to extend the battery box so that the battery could be located as far forward as possible.
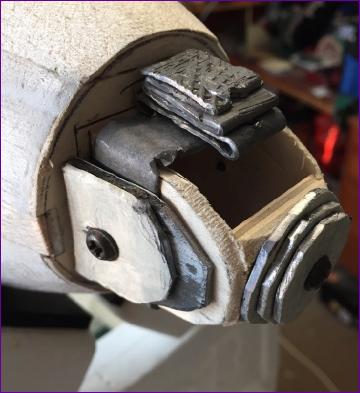
After that it was a case of cutting and folding lumps of lead to fit around and in front of the box, test fitting the spinner at regular intervals. The picture shows about half a pound of lead in place which is enough to balance the airframe in its uncovered state, so I'd guess that another few ounces will be needed after covering. I'm currently considering the idea of part filling the spinner with silicone when fitting it so that it supports the lumps of lead. It might also be possible to mix some lead shot in with the silicone at that point too. These are techniques I've never tried before so I won't be rushing into it.
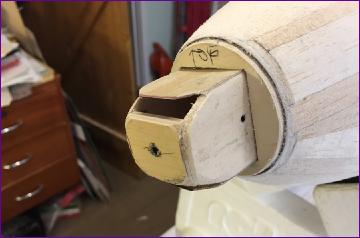
Silicone or not, the spinner needs a backplate to be fixed to and this of course had to be cut out to fit around the extended battery box. Once that was in place, the spinner moulding could be temporarily fitted, drawn around, and the fuselage finally sanded down to the line.
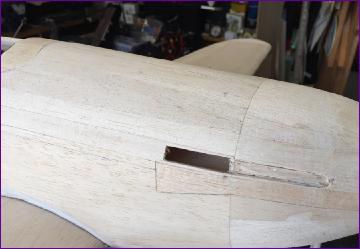
Cutting the apertures for the exhausts was the last job on the fuselage before fitting the tail surfaces.
In odd glue-drying moments during all of this I had been gluing the radiator parts together. After a good session with the sanding block, it's quite a pleasing shape. At the moment I'm still undecided as to whether to glue this on permanently as a handgrip for launching or attach it with Velcro and/or magnets so it can be knocked off on landing. Two more upside down pictures I'm afraid. My excuse this time is at least they show the radiator as it will be seen when attached to the underside of the wing
So another month draws to a close. The airframe is complete so, if I really had to, I suppose I could get the model covered and finished in time for the mass fly-in in ten days time. However since family circumstances mean that I'll be elsewhere that weekend (and we have the prospect of some decent flying weather in between!), I'm not going to rush. Hopefully though, next month's installment will include a flight report.
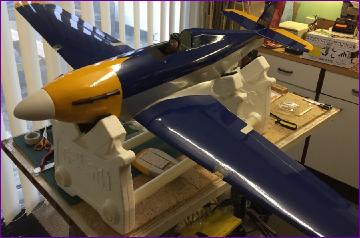
September 2018 Well, it will come as no great to surprise to the builders amongst you that, one month on, the Hurricane is not quite finished. The good news is that it is now covered but, since I haven't yet got the markings on, I don't want to give too much of a spoiler as to the rather unusual (to some, perhaps shocking) colour sceme. There are though a few clues in some of the pictures.
I still have the canopy to fit, but did do some glazing over the landing lights. I used quite thin acetate (from re-cycled packaging material) and was able to roll it around the leading edge contour without the use of heat. I used RC Modeller's Glue and left it a few days to make sure that it wasn't going to lift before trimming with strips of vinyl.
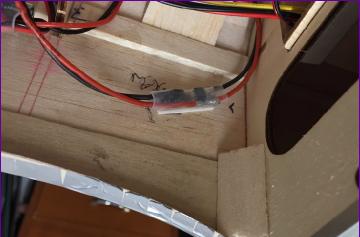
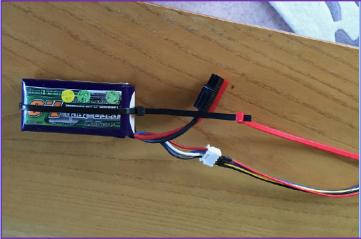
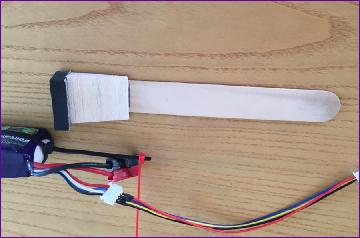
I ended up spending a disproportionate amount of time working out how to insert and retrieve the 3s 1300mah LiPo battery. The eventual solution is shown below - a couple of cable ties enable it to to be withdrawn without pulling on the wires and the ply/balsa pusher serves to push it ino place. A small screw through the end of the pusher then locks it in place so that the battery can't shift rearwards on launch. The main power leads from the battery have still to be extended in this picture. The extension to the balance lead enables the battery's state of charge to be checked in situ.
Well, that's about as far as I'm prepared to go at the moment. I do hope to pick up the markings this evening so shouldn't have to keep you waiting too long for the full reveal on the colour scheme. Meanwhile, here is a bit of a teaser:
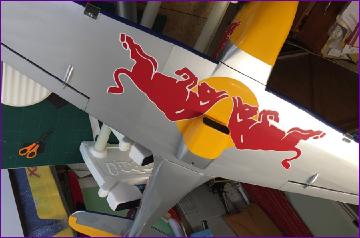
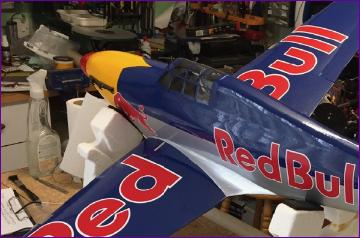
October 2018 Uniquely, I'm writing the first part of October's diary entry less than halfway through the month. Solely, you understand so as not to keep you in suspense about the colour scheme longer than necessary. So, here's the reveal:
To the best of my knowledge, Red Bull haven't yet added a Hurricane to their fleet and their corporate scheme seems to have moved on a bit in recent years so, even if they did, I doubt it would look anything like this. Anyway, I'm pleased with this scheme, dreamt up by Tim Calvert of Modelmarkings.com who supplied the covering and the decals. It should be nice and visible and if need be, I've always got the landing lights to show it up a bit more.
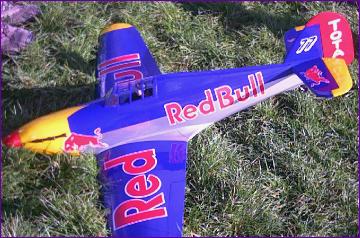
With about 8oz of lead in the nose, plus a 3s 1300mah LiPo battery, the model weighs in at 3lb 2.5oz, so the bit of lightening work on the tail end and the film covering have proved worthwhile.
Hopefully I'll be back later in the month with a flight report and maybe a few more pictures - at the moment storm Callum is preventing me from even taking the model out for a photo on the lawn!
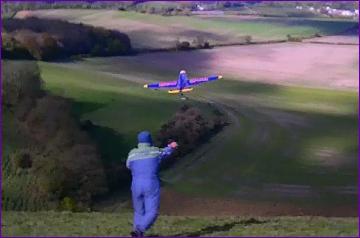
Update: As October draws to a close, I'm happy to report that the Hurricane has been flown. It was in blustery conditions but coped very well. The handling seems to be very benign so hopefully it won't be too tricky to land in some of the confined areas on our slopes.
There could easily have been a rather sad post script to this story. On the day of the maiden flight, the winds became more gusty after lunch and so I deferred any further flying of the Hurricane until another occasion. On returning home, I put the model together again to check whether there were any adjustments needed to return the trims to neutral. After switching it on, I did a quick control check which was okay. But the next time I moved the stick the left aileron stopped responding. First thought was a connection problem but it soon became clear that the servo was seized solid, whether powered or not. I have used these servos (Corona) in at least half a dozen models and this is the first issue I’ve encountered. The servo has now been replaced. All very irritating but, considering what would have happened if the servo had expired a minute earlier in its short service life, I must count myself very lucky! Let's hope that this is a sign of a model with a charmed life (rather than an indication of a batch fault in all the servos!)
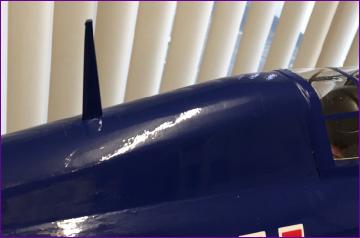
And another update - December 2018 The Hurricane has had a couple more outings, the most recent being in very light lift where it again acquitted itself very well. No more servo failures to date either! I've also added a tiny bit of scale detail in the form of an aerial mast. The real motivation for this was though functional rather than aesthetic. With the battery buried in the nose and no access hatch, rather than fit an external switch I decided to try out an internal magnetic switch.
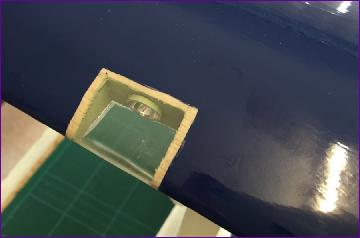
There are a few on the market but I chose this one from Zepsus. It comes with a magnet on a lanyard so that you can turn it on and off by swiping the magnet over the switch. The switch is attached to the inside of the fuselage and of course you need to know whereabouts on the outside of the fuselage to stroke it with the magnet. A neat sticker is supplied for this purpose but, since part of the reason for adopting the magnetic switch was to keep the external appearance incluttered, I wanted instead to align the switch with a distinctive feature of the colour scheme.
I'd originally hoped that I might be able to align the switch with the bull's eye but unfortunately the position of the bull means that it's its other end which has to be wiped in order to operate the switch! The arrangement works well though, but I found that having the magnet on a lanyard round my neck was a bit inconvenient.
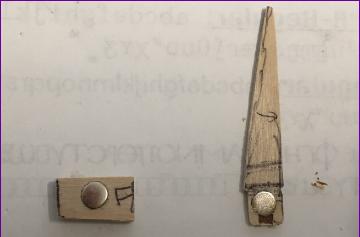
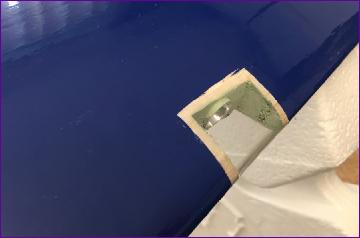
It was at this point that the PSS trick of holding vulnerable bits and pieces onto the airframe with magnets came to the front of my mind. So a slot-in aerial mast was fashioned out of 1/16in ply, with a neodymium magnet embedded in its base. A matching magnet was fitted in the wall of a simple 1/16in ply mounting box which in turn was embedded in the balsa turtle deck. So, to turn the model on or off, the mast is withdrawn, the bull's backside wiped with the magnet in the end and the mast re-inserted into its slot. At the end of the flying session the battery is disconnected (although the residual current drain of the magnetic switch is so low that it wouldn't be an issue if I forgot) and the mast is stowed insided the fuselage attached to a convenient steel screw.
 Then it was on with the planking. This was done in 3/32in balsa and, although not a quick job, it was pretty straightforward and I'm sure it was less stressful (both for me and the balsa) than grappling with the ammonia treatment.
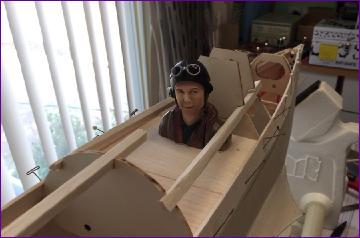


 Well, that's about as far as I'm prepared to go at the moment. I do hope to pick up the markings this evening so shouldn't have to keep you waiting too long for the full reveal on the colour scheme. Meanwhile, here is a bit of a teaser: