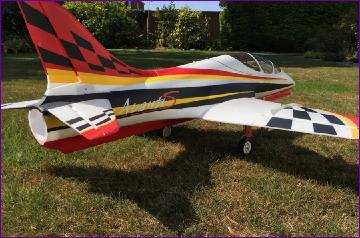
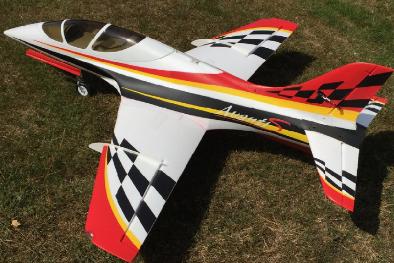
When I splashed out the princely sum of £29 on my bargain basement Hobbyking Hawk a couple of years ago, little did I know what an expensive move it would eventually prove to be. Whilst I have enjoyed flying the Hawk (apart perhaps from the hand launches), in no way would I have said that I'd been bitten by the edf bug. However, when I saw someone at the field with an Avanti, I had to admit that the performance was most impressive. Then, when my regular flying companion said that he was going to buy one, I was overwhelmed with a feeling of 'oh well, why not'!
The version I went for has the motor, fan, servos and retracts all pre-installed, so all I had to buy was a 6-channel receiver and a couple of 6s x 4000mah LiPo batteries.
When the large box arrived, it was clear that it had had quite a severe knock at some point on its travels, as you can see in the picture. However, such is the quality of the packing that all parts escaped unscathed.
The parts coount is pretty low and, with all control surfaces pre-hinged, the bits bag is smaller than usual too, consisting largely of pushrods for the control surfaces.
Assembly of the model is essentially just a matter of screwing on the tailplane, fin and wings. A tube of glue is though included to secure the wing fences and to attach the tinted canopy to the cockpit floor. At first it seemed odd that this last step had been left to the buyer, considering how much other work had been done at the factory. However the cockpit floor is a pristine white so, by leaving the canopy off, they give you free rein to paint, fit out and populate the cockpit as you wish. I opted to give the base a couple of coats of paint but didn't bother with a pilot. This is not a scale model after all.
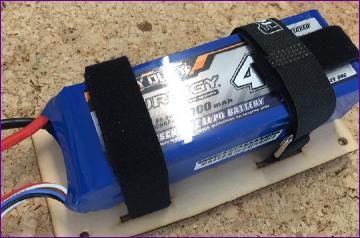
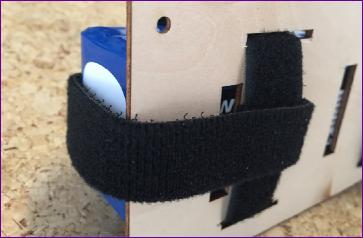
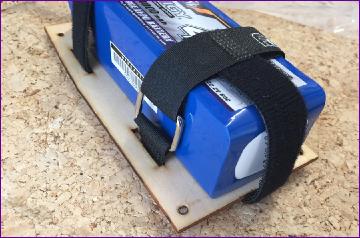
A single velcro strap is provided towards the rear of the battery tray. However, my battery is at the lighter end of the recommended range so has to be positioned quite far forwards. Seeing that the ply floor had a second pair of slots cut in it, I fitted a second strap and, for good measure a further strap to go round the front of the battery.
After these photographs were taken I glued the supplied piece of non-slip matting to the ply floor and the battery is now very secure.
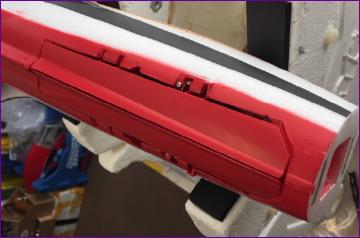
Such is the quality of the fit and finish on this model that it comes as something of a shock when something is not up to scratch. At least it would have been a shock had I not read all about it on the forums before buying the model. The achilles heel of this model is the nosewheel doors. These are of a fairly soft, flexible plastic and are held closed by a spring which is pulled into the bay when the nosewheel retracts. However, the only stops that limit the travel of the closing doors are at the front and rear of the aperture, leaving the doors unsupported against the pull of the spring in the middle. As a result (no doubt aided by some temperature and humidity cycling during its months of storage and transport) the doors as supplied are severely bowed, overlapping at the centre and gaping apart at the ends. Unfortunately I didn't think to take a picture of this sad sight, but there are plenty from other buyers on the aforementioned forums.
The doors were removed and, with the heat gun played on them, straightened as best I could. Then lengths of 2mm diameter carbon rod were cyanod to the inside of the doors before re-fitting them. This fix worked surprisingly well and the doors now fit satisfactorily. Since taking these pictures, I've given the rods (and the white cyano stains) a coat of red paint to neaten things up.
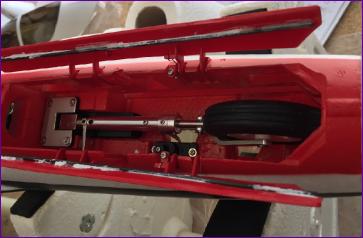
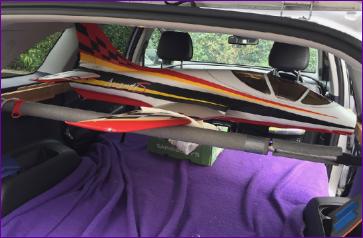
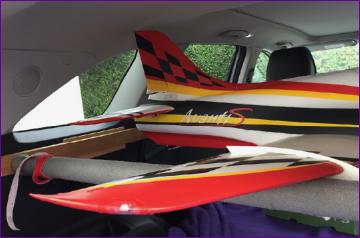
The wiring in the Avanti has all been rationalised so that there are just 6 leads to plug into the slots of a 6 channel receiver, so transmitter programming is very straightforward. So, with the model all assembled and checked out, there was just one more, very important, check to do - will it fit in the car in one piece!
Happily, as you can see from these pictures, not only does it go in, it sits very nicely on my rack, leaving the boot floor clear for other models. A really nice bonus, that.
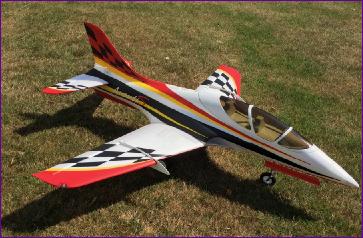
For once, I didn't have too long to wait before the weather was suitable for a maiden flight. In fact it was such a good day that there was a record turnout at the field. Fortunately the owner of the Avanti which started it all was there, so I had him have a look over the model and took his advice on adjusting the control throws somewhat. I'm happy to report that the maiden flight went off without a hitch. This is one of those models that feels well sorted from the outset. It needed a few clicks of uptrim and I ended up taking out practically all the flap-to-elevator compensation. The flight was kept short so that I could see on how the battery was doing and also check that nothing was coming loose. Full flap was used on landing and the Avanti descended predictably and was easy to flair out for a gentle touchdown. All in all, a very promising start.
No flying shots yet and, given the speed of the model, it may be a while before that omission is remedied. But meanwhile, I look forward to many more smooth flights.
 When I
 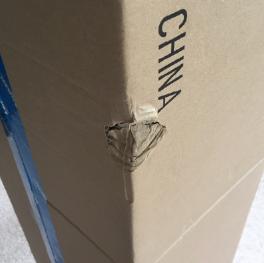 When the large box arrived, it was clear that it had had quite a severe knock at some point on its travels, as you can see in the picture. However, such is the quality of the packing that all parts escaped unscathed.
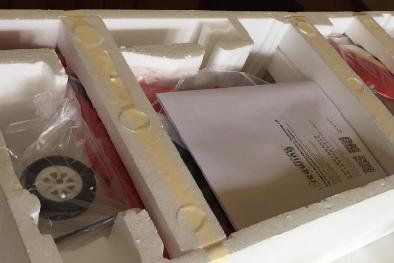 The parts coount is pretty low and, with all control surfaces pre-hinged, the bits bag is