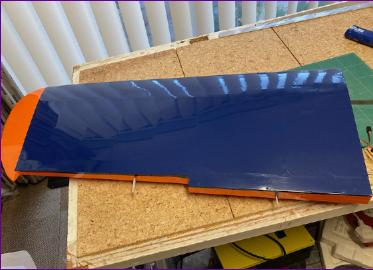
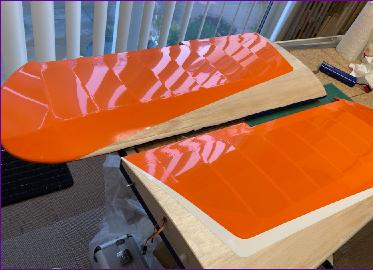
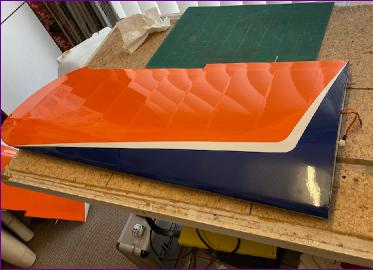
The general rule for covering is to work from the back to front, bottom to top. Sometimes this gets compromised though to avoid overlaying a dark colour with a lighter, translucent colour. However, in this case, all colours (including the white) are pretty opaque so I started on the bottom of the wings before moving onto the slightly more complicated scheme on the upper surfaces.
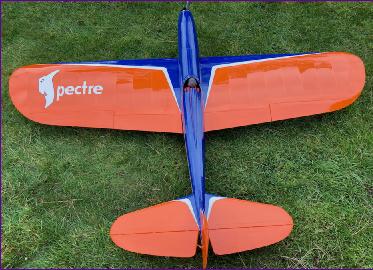
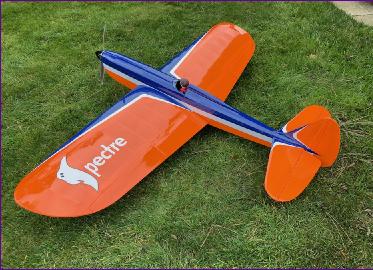
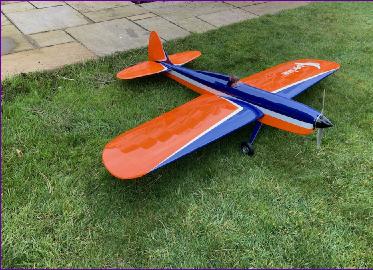
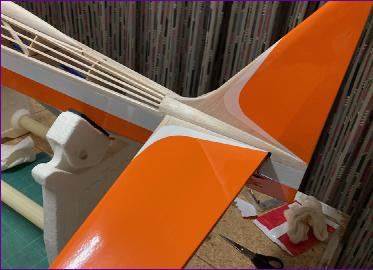
The wings were then temporarily attached in order to finalise the colour scheme of the fuselage. The whole scheme is based loosely on the illustrations used in the publicity material for the original Spectre.
Before starting on the fuselage covering, I remembered in the nick of time that a hard point would be needed to anchor the guard wires to be fitted around the tail. A small piece of ply was duly let into the underside balsa sheeting.
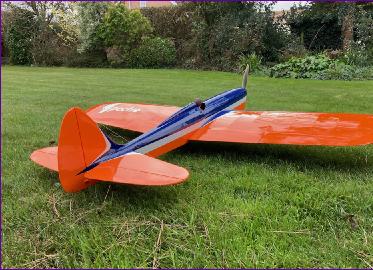
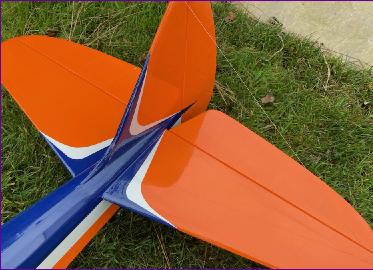
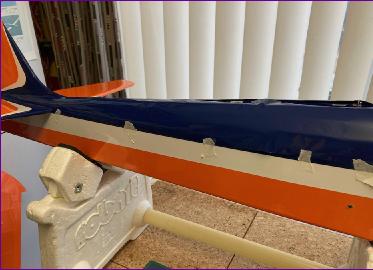
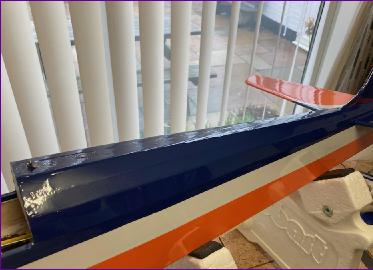
Fuselage covering then proceeded, working from bottom to top, incorporating the tailplane covering along the way. The fillets between tailplane and fin and the stringered turtle deck were areas of concern but turned out pretty well in the end. I find that the secret is to work out which edges of the piece of film need to be cut accurately beforehand and which edges can be trimmed in situ. For the turtle deck, for instance, this meant that the join line between with the white film was the critical pre-cut edge so there would have to be a join along the centreline of the turtle deck. As it happens, most of this join line is covered by the detachable head rest.
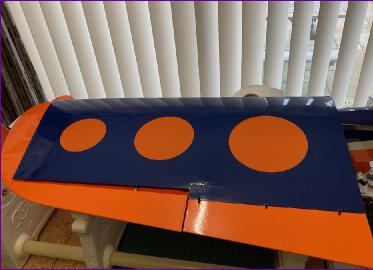
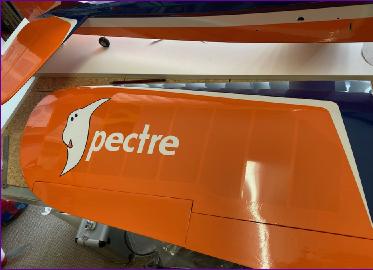
Finishing touches were provided with some vinyl circles on the underside of the wings (thanks Jonathan) and a Spectre logo on the top (thanks Tim).
With the covering complete, attention turned to the electrics. A Y lead was made up to enable two batteries to be used in parallel when towing, then it was time to run up the motor to finalise the choice of propeller. Unfortunately, this is where things went pear-shaped.
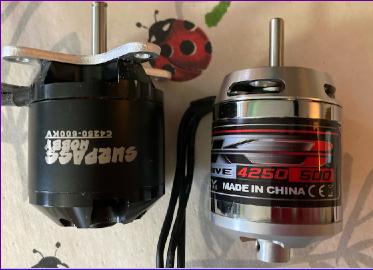
Maybe I should have realised when my trusty decades-old clamp meter failed that this was an omen that things were not going well! I’ll spare you the tedious details but the basic problem was that I could not get the motor ( a Surpass Hobby C4250-600kv) to run smoothly at full throttle. The propeller balance was checked but I could see that the spinner and propeller were not running true. This turned out to be down to the screw-on prop driver supplied with the motor. Fortunately, I managed to find another one in my spares box.
With this in place, the spinner now ran true so I set about attempt number two. Now the motor was smooth at low to mid power levels but unfortunately, the same problem arose, with the motor threatening to tear the front of the model to pieces as more power was applied. All this was on a 12 x 6 APCe propeller which should not stress the motor however, just to make sure, I dropped from a 6s to 4s battery and was surprised to see that the vibration still set in before full power was reached. It’s hard to be definitive about the cause of this problem but my suspicions now centre on the motor itself perhaps being out of balance or defective in some way. There is though always the worry that there may be some unfortunate resonance issue with the airframe itself.
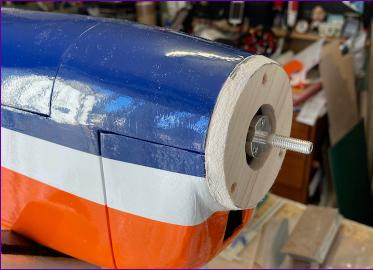
In order to proceed, I pinched a similar sized motor out of another model. You can see from the pic (below left) that, although the motors are nominally the same size, the Surpass has an internal grub screw to attach the drum to the drive shaft whereas the Turnigy has an external boss. This results in the effective length of the Turnigy motor (from firewall to spinner backplate) being about 5mm greater (below right) I had spend a lot of time making sure that the front end of the fuselage blended nicely into the 75mm spinner so this really wasn’t good news! However this motor was taken from a 72in Barnstormer that has been used for towing. The propeller and speed controller have also been moved across to the Spectre so this is as near as I can get to a proven power plant. Interestingly, the Turnigy is about 3oz heavier than the Surpass Hobby motor, which may perhaps indicate some quality compromises in the latter motor?
At time of writing, a 70mm spinner is en route to me and I’ll then have to try to find an aesthetically acceptable way to fill the gap between spinner and nose ring before (or maybe after?) venturing outside again for another attempt at to run up the power train.
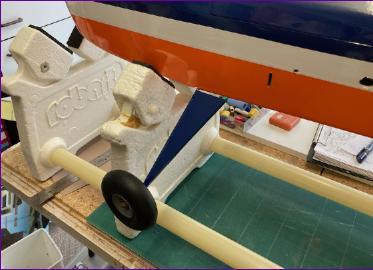
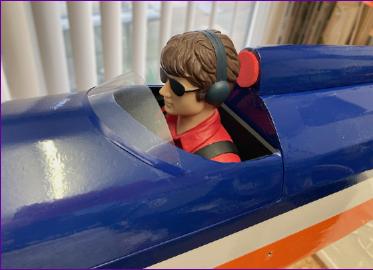
Meanwhile, the last remaining jobs such as the undercarriage fairings and pilot’s windshield and headrest have been finished off. The fairings are simply cut out of balsa sheet, attached with silicone and covered with film. The windshield is a piece of plastic packaging, cut using a paper pattern with three ‘tangs’ that fit into slots cut into the balsa decking. So now, the power test (and of course the obligatory failsafe and range checks) are all that stands between this model and its long-awaited maiden flight. Tune in next month. . . .
February 2022
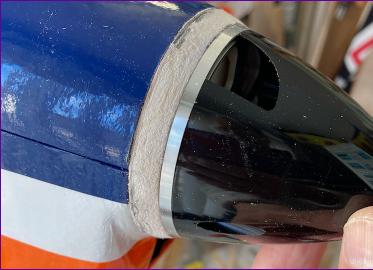
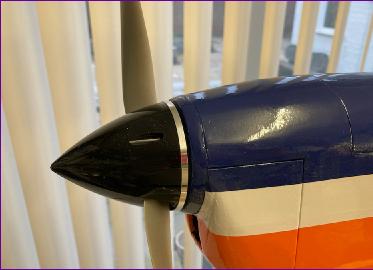
With the new smaller spinner to hand, a ring of balsa was made up to fill the gap. Loyal readers with good memories may recall that, up to this point, the cowl had no positive retention method so, to try to turn what is really a bodge into a useful modification, this filler ring was drilled to take three small countersink head screws so that it could be used to secure the cowl. Once the ring had been sanded to match the contour of the fuselage, cowl and spinner, the ring was removed and covered with blue film before being finally fitted.
The model was now assembled once more and, much to my relief, successfully went through its power test without any significant vibration. So, one last photoshoot, and it was now just a case of waiting for suitable weather to see how it performs.
Fortunately, I didn’t have to wait long. This was such a landmark day that, for once, I wrote up a fairly full account of it immediately afterwards:
With one battery on board and all the usual checks completed, the model was taxied out and lined up for takeoff. There was a bit of crosswind from the left so, mindful of the high torque likely to be generated by the 14in propeller, the throttle was opened somewhat gingerly. As expected, the model yawed left almost immediately. Once this had been corrected, the throttle was eased open and the Spectre accelerated away and lifted into the air with no drama.
It was clear that some down trim was needed so, once the model was flying straight and level, I pulled on the autotrim switch and the transmitter beeped merrily as it dialled in the trim for me. Once trimmed, control harmonisation felt good and a gentle dive test showed that the cg was on the safe side but not excessively so. The autotrim procedure was then repeated with half and then full flap deployed and once I was happy with the trims, the Spectre was brought round to an easy and uneventful landing.
After a short break, a second flight was undertaken on the same battery and a few basic aerobatics were flown to check that the control throws were adequate and I have to say that the model is one of those that immediately inspires confidence. I didn’t do an actual stall test but at no time did it feel like it was about to ‘bite’. These two flights totalled 8 minutes and the battery was still showing 69% capacity remaining so, even allowing for the fact that future flights might be somewhat more vigorous, there should be no duration worries, even in ‘single battery’ configuration.
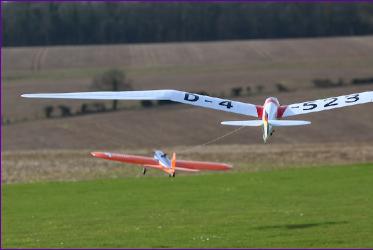
The next step was to fit two batteries, connected in parallel, and do another trimming flight. The second battery is slightly behind the cg so unsurprisingly, a bit of re-trimming was needed. However, once this was done, I felt it was time to test the Spectre’s credentials as a tug. Bill Ebdon bravely offered to be the Guinea pig, with his lovely new 1/5 scale Minimoa. I’m not sure which of us was the more nervous but all went surprisingly smoothly. Once the glider had released, I deployed the flaps and began the descent. There was another pilot preparing to take off so I briefly put the flaps away until it was clear to land. Landing was again uneventful - except that I realised that there was no towline attached. That was when I remembered that I’d briefly touched the autotrim switch when reaching for the flaps - and the tow release is on the same switch! A search team was dispatched but, because I couldn’t remember at what point I’d caught the switch, we didn’t really know where to look and unfortunately the line wasn’t found.
However, loss of towline not withstanding, I count this as a very successful first outing. My thanks to Chris Williams for the pics below to record this happy event.
Apart from making up a new towline, adjustments made in anticipation of the next session included:
• Adjusting the battery trays so that the front battery can be moved back a bit and the rear battery moved forward by a similar amount. Hopefully this will reduce the trim change needed when the second battery is fitted.
• Elevator pushrod linkage adjusted to bring the servo arm back to a true neutral.
• Transmitter re-programmed with a normal/towing switch which, in conjunction with the three position flap switch, gives five separate flight modes, each independently trimmable.
• Tow release switch de-activated in all modes except when towing with flaps raised, the idea being to reduce the risk of repeating the inadvertent line drop during descent.
• New Emergency function added, active in towing mode when flaps deployed, which releases the towline if full throttle is applied. Thanks to Barry Cole for this one, designed to help the tug’s chances of survival if the towline snags on vegetation during the landing approach.
Unfortunately, the second half of February yielded no more flying opportunities, as three named storms swept through the UK within a week. However, if this first outing is anything to go by, it looks like the Spectre should more than justify its place in the fleet and I look forward to getting to know it better over the next few months.
March 2022
I had three more outings with the Spectre during March. At the first session, with the arrival of my new clamp meter, I was able to do a proper power check and was surprised to find that the full throttle current draw was over 80amps. This surprise turned to alarm when I realised that I only had a 60a ESC in there! Fortunately, HobbyWing ESCs, which I have been using almost exclusively for many years, are pretty robust and fortunately no problems had arisen. However, I thought it prudent to confine the Spectre to general aerobatic use for the rest of that session. With an 80a ESC fitted, aerotowing services were resumed next time out and the model continues to acquit itself well in both roles.
In addition to the mods detailed above, I have fitted an SM Modellbau Unisens-e telemetry sensor. This is set to give altitude voice readouts when over 400ft and, after the flight, the maximum altitude reached and maximum current drawn can be seen on the transmitter screen. Most importantly it also keeps track of the battery capacity used, making it easy to see if there’s enough left for another tow. First impressions are that five or six tows of a 1/5 scale glider are possible from a pair of 4000mah batteries.
The only other modification planned is to try a 14 x 7” propeller instead of the 14 x 10 currently fitted. I think this should increase the static thrust slightly (the hardest bit of the tow is getting the glider moving across the ground) whilst reducing the full throttle draw, giving the batteries a slightly easier time. Once the propeller selection is finalised, I’ll update the provisional performance figures on the key data page.
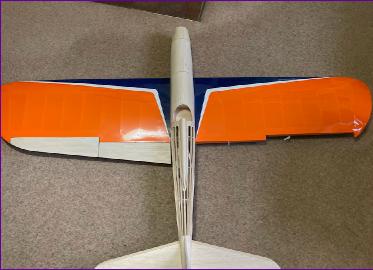
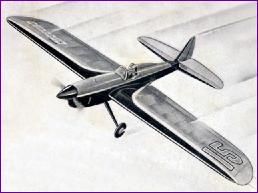 The wings were then temporarily attached in order to finalise the colour scheme of the fuselage. The whole scheme is based loosely on the illustrations used in the publicity material for the original Spectre.
 With the covering complete, attention turned to the electrics. A Y lead was made up to enable two batteries to be used in parallel when towing, then it was time to run up the motor to finalise the choice of propeller. Unfortunately, this is where things went pear-shaped.