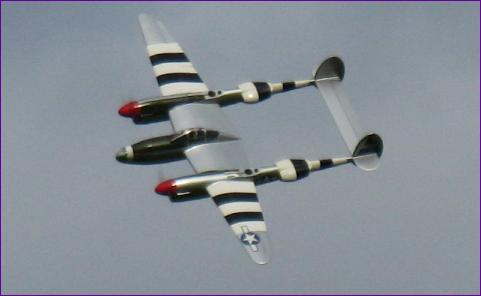
P38 2009 Refurbishment If you have read the original 1997 article, you will know that the build of this model was a major weight reduction exercise. Back in the days of heavy NiCd batteries and inefficient ferrite 'can' motors, if an electric model of this sort was going to fly well it had to be built to fly, not to crash. Sadly, crash it did, as a result of a midair collision at Woburn Abbey in 1998.
The model survived pretty well considering the impact and was soon flying again. Some time later though, I noticed a crack in the cockpit floor. Not particularly serious, since the floor is not structural. Much more worrying though was the way the crack opened and closed as the wing was stressed. It was clear that the efffects of the Woburn crash went further than I first thought and that the vital joint between the two wing panels had suffered.
Perhaps I shouldn't admit that I continued to fly the model in this state, but there was no way of getting to the wing joint without butchering the central pod which had been built in situ, and I was reluctant to do that. Anyway, although the crack opened when the wing panels were pressed down, positive 'g' loads only closed it up and so, provided negative 'g' manoeuvres were avoided, maybe it wasn't too bad.
Of course, every belly landing stressed the joint a bit more and eventually I had to face the fact that there was very little holding the wings together. By now, the P38 had logged 76 flights since the Woburn crash so perhaps my original decision to keep on flying it wasn't so rash after all. |
||
|
||||
This picture also shows the brace installed and the various splits in the wing sheeting taped closed after running superphatic glue into them. In terms of structural repairs, that was pretty much it really. However, it couldn't really be that simple could it! Powering Up
Considering that I made lightening holes practically everywhere in building this model, it is ironic that the holes for the motor wiring seem to have been made as small as possible! Routing the new wiring therefore was a stressful business, to the accompaniment of the sound of splintering wing ribs, but eventually the wires were in place (in fact the photos were taken out of sequence - you can see the wires in the photo showing the dihedral brace).
With that done, I fitted a handed pair of Tornado 8x6 propellers which were bought for this model many years ago but have lain unused ever since. They have the merit of being pretty flexible which I hope will reduce the risk of bending motor shafts or wrenching the firewalls out during belly landings. However, when I tried to run the motors up, I got severe vibration before even reaching the half throttle point.
This brought back bad memories of the early days with this model of disintegrating gearboxes etc., due to the cantilever loads of the large cheap (and unbalancable) spinners. I had a half-hearted go at balancing the props and tried again without the spinners. This time the motors ran smoothly individually but there was severe beating at certain rpm when run together. Nonetheless, I went ahead and fitted the spinners and played around with different relative orientations of the propeller, spinner skirt and dome until they looked to be running reasonably true.
It then occurred to me that I was resting the model flat on a picnic table for the tests and this might be stopping the prop wash from flowing smoothly over the aeroplane, so I ran up each engine separately again with spinners fitted to check that they were reasonably smooth individually then lifted the model up off the table before running the two motors together. The beating was still there but the vibration levels were much less threatening so hopefully it will all hold together. We shall see.
Finishing Up
Footnote: Having put 16 flights on the P38 during 2010, I am happy to report that it is rejuvenated. The available power is more than it has ever enjoyed before and its weight is a couple of ounces lower than it was when first built. I have programmed differential control of the motors into the rudder stick so it is now a four function aeroplane!
|
||
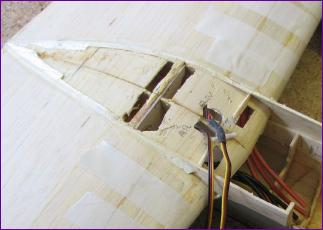 First job then was to make up a dihedral brace out of 1/16in ply. Glue was then worked into the open wing joint, before closing it up one more time and epoxying the dihedral brace in place.
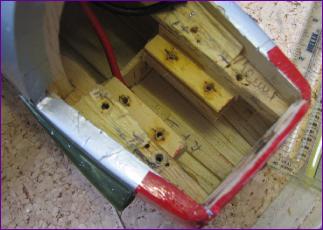 This view into a motor compartment shows the scars from the various gearbox changes that the model underwent early on in its life. As you can see, most of these were beam mounted in some way - not really an option for a brushless outrunner!
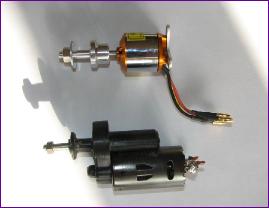 The picture on the left illustrates just how different the old and new powerplants are - and of course the new motor needs three wires instead of two.
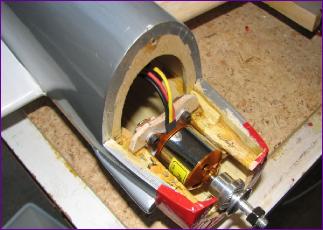 Once enough space had been cleared, a motor mount was made from 1/8in ply, notched to fit around the beams and epoxied in place. The other job was to re-work the battery stowage to take a 3s 3700mah LiPo battery.
 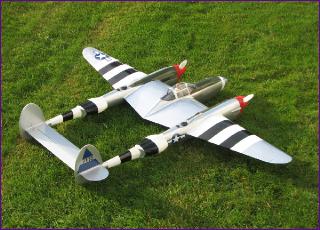 So now it was just a matter of glueing the cockpit section back on, making good the joint and then re-covering the inner wing panels. The rest of the model is a bit battle scarred but I've got used to that so a halt was called at that point and the model put back in the rack to await suitable test flying weather.