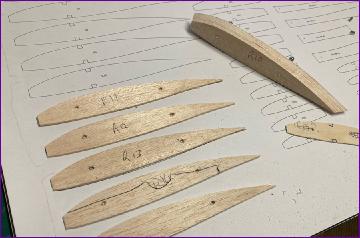
November/December Part of the thinking behind not ordering a set of laser cut parts was that the Topaze, with its straight tapered wing, would lend itself to cutting out the ribs using the time-honoured sandwich method. This I did, although it was by no means as straightforward as it sounds. Firstly the leading edge is not actually straight - there is a slight increase in the taper from the root of the aileron. No matter, There was no way I was going to cut all 37 ribs in one sandwich anyway. The second potential pitfall is that the sandwich method only works if all the rib blanks are the same thickness. I was planning on using 1/8in balsa for the first few ribs at the inboard end, 1/16” for the tip section and 3/32” for the ones in between. After much cogitation, I decided to trace and cut the 1/8” ribs individually, do the 3/32” ribs in two batches then make the 1/16” ribs in a third batch. With these decisions made, I could at last trace the relevant ribs onto 1/16” ply and cut the out to form my templates, followed by the requisite number of balsa blanks to go in between them.
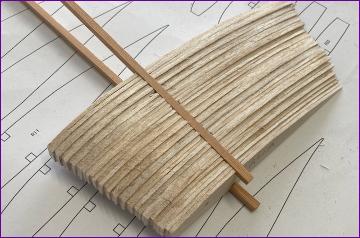
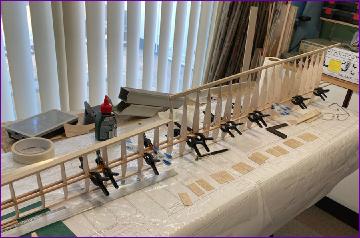
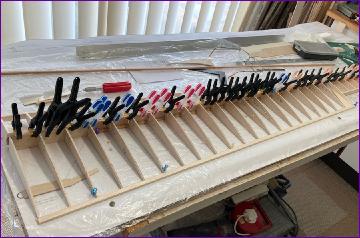
After the batch sanding session, the ribs were checked individually against the plan before being duplicated to form a second set. The ribs were then bolted together again in batches to enable the spar slots to be cut. Holes for the servo wiring were also cut at this stage.
A number of the ribs have ply reinforcing pieces at the trailing edges so these were added next, and at last wing building could begin.
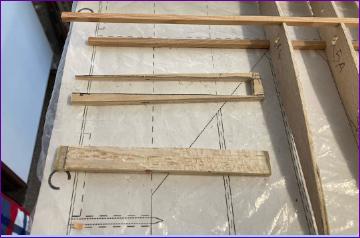
Well not yet. My 48” pieces of 3/16”sq spruce were not long enough so extension pieces had to be spliced on. And then there was the trailing edge to be made up of a strip of 1/8” balsa glued to a piece of 1/16” spruce (or, in my case, basswood). So now we’re ready to go.
Well, not quite. In the nick of time I remembered that the spars have to be tapered towards the tip so that the skinny outer ribs don’t have to be notched too deeply. At last a dry assembly could be attempted to enable some final fettling of the ribs to make sure that they all seated neatly on the bottom spar and trailing edge, whilst still lining up reasonably at the leading edge.
Because there wasn’t going to be much room on the bench once this phase of building got properly underway, it seemed a good idea to cut out the false leading edge pieces too, and the aileron spar. All these parts then had to be duplicated, the second set being bundled together and set aside, along with the second set of ribs, to await the start of the second wing.
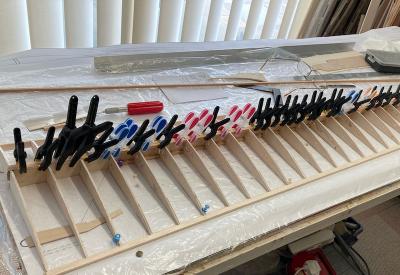
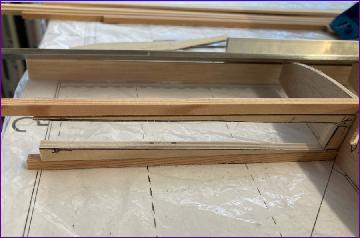
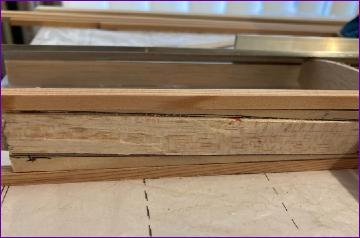
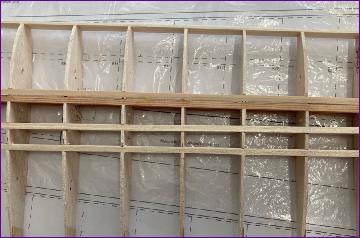
After all the preparation, actually gluing the ribs down on the lower spar and trailing edge came as a pleasant interlude.
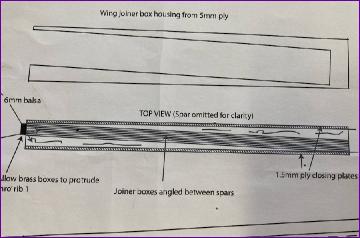
With the upper spar dry fitted, it seemed a good time to tackle one of the key parts in the build, the wing joiner boxes.
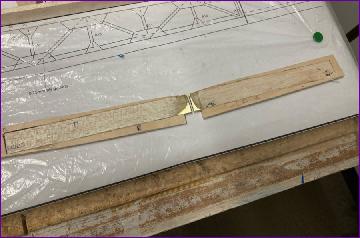
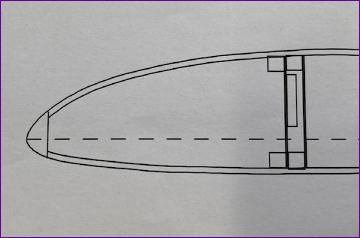
The Topaze uses the traditional ‘steel blade in brass box’ joiner system. As well as dihedral, the wings also have a bit of sweep, so the box itself has to be angled in both directions. First, a piece of 5mm ply is cut out to accommodate the brass box and checked for a fit between the spars. Balsa was then epoxied to either side of the box and roughly shaped to provide the sweep angle.
After another check fit between the spars, this fattened up box is then glued into the aperture, and finally the balsa is sanded down flush with the ply. The whole process is then repeated to make sure we have a handed pair - which are then carefully labelled.
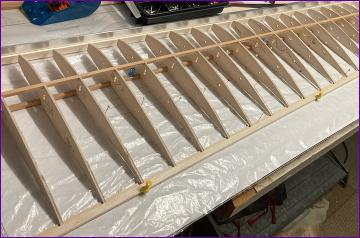
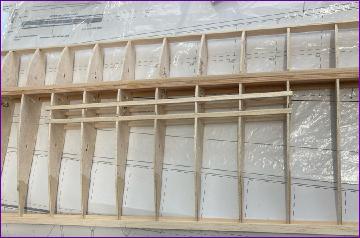
Once the upper spar had been glued in the process of cutting and fitting spar webs came next. The joiner box was epoxied in at this point, followed by the missing inner ribs. Notches were then cut to take the subspars, forming an I-beam.
This seemed to be a good point to remove this wing from the board and make a start on the other one. However, we were now in the run up to Christmas and I know that this always results in an acute shortage of ‘putting down space’ so perhaps it wasn't such a good time to be pinning down a delicate structure on the bench!
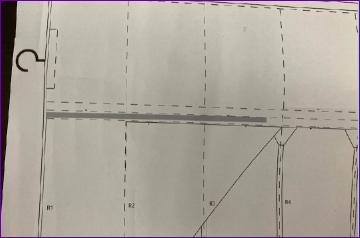
So, casting around for a fill-in job on the first wing, I decided to fit the spars fore and aft of the airbrake aperture.
This went well, and I noted that, because of the sweep, these spars were not parallel with the main spar. Then, a few minutes later, the proverbial penny dropped with an ominous thud - the angle of the airbrake spars implied the wings were swept back, but surely I remember noting that the angle of the joiner boxes would give a forward sweep!? A check on the detailed drawing of the joiner box confirmed that indeed the wings would be swept forwards.
By now the cold sweat was breaking out and, sure enough, lifting the wing from the plan revealed another picture of the joiner box angled in the opposite direction, for sweepback!
There then followed an e-mail discussion with the designer chappie and a couple of other experienced glider builders about the best way of recovering from this blunder. All options from simply bending the joiner bar to a total re-build were discussed.
At time of writing though, a start is being made on the second wing, just to give myself time to get a better perspective on things before deciding on the way forward. Hopefully all will be resolved by the time of the next instalment. Click here to find out.