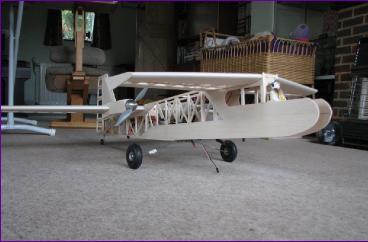
The Duck Twin was designed by Charles Sully (aka Canard Addict) who documented his build on the Canard thread on RCGroupsduring 2012. The original prototype is pictured above. After the rather protracted build of my P47 during last winter, I felt it was time for something smaller which hopefully would be a little more relaxing to build without the spectre of scale fidelity looking over my shoulder questioning every little decision.
There is no published plan for this model but Charles was kind enough to provide me with a set of his drawings, sketches and notes, together with a number of photos of the prototype. A quick scavenge around the workshop turned up a number of bits and pieces that could be used so, after putting together a fairly modest shopping list, the bench was cleared and a start made.
September 2014
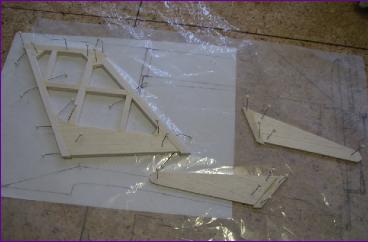
Following Charles's suggestion, I built the canard first. This was a good move because some aspects of the construction were new to me so it was good to get an idea of the best order of doing things while working on a small scale.
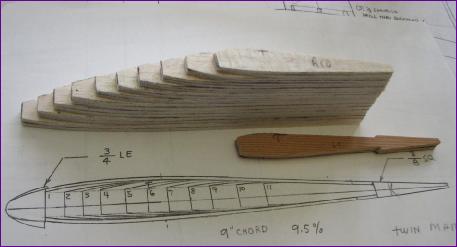
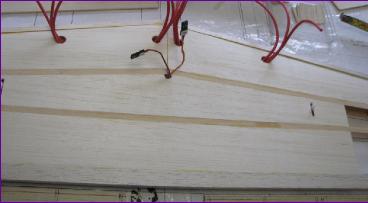
The spars are 1/4 x 1/16in basswood so it makes sense to make up the lower skin first. The centre section of leading edge sheeting was left out until the rest of the leading edge sheeting had been drawn up onto the ribs.
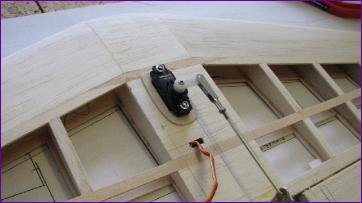
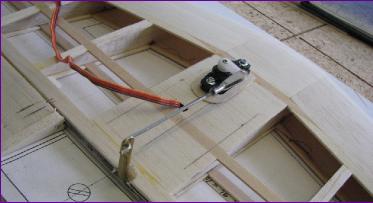
Charles used two separate elevator servos but I opted to use just one so, as soon as the ribs were in place, the assembly was flipped over to sort out the servo mounting.
Did you spot the mistake in the second picture above with the positioning of the hinge blocks?! With the top sheeting and spars added, it was then a case of making up the elevator horn/joiner and the solid balsa elevators.
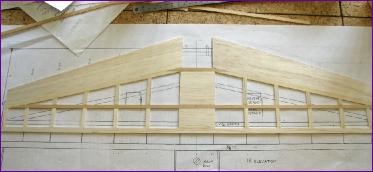
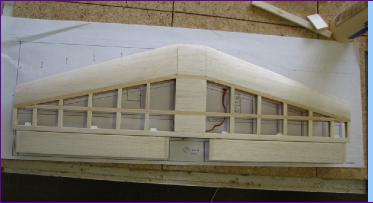
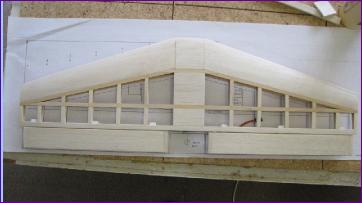
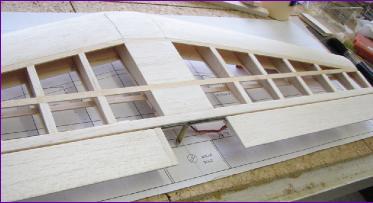
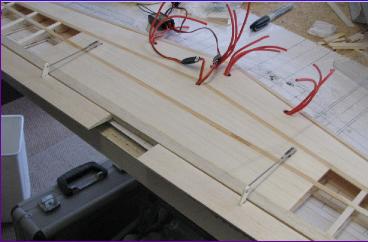
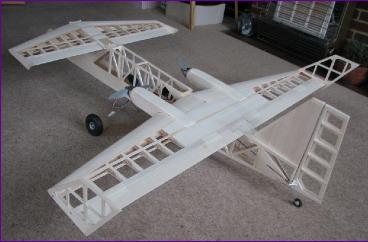
The fixed sections of trailing edge and the tip plates have still to be made but at this point I decided to move on to the main wing. As with the canard, the ribs were first cut out using Charles's method of drawing round a card template which is progressively trimmed for each pair of ribs. The rear section of all the ribs is identical so this method does result in a set of ribs that require far less trimming and sanding than with other methods and more complex sections.
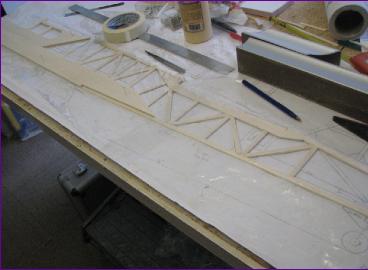
By the end of the month, the trailing edge, lower rear spar and cap strips were laid down, ready to receive the ribs. . . .
October 2014(more on October) Lots of photos this month so to keep this entry manageable I've had to dedicate a separate page for most of them.
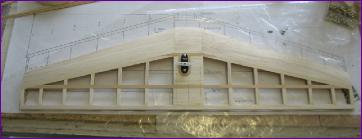
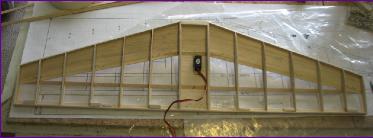
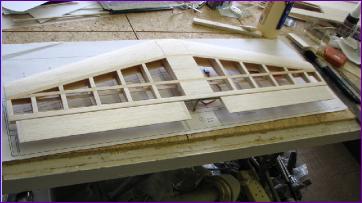
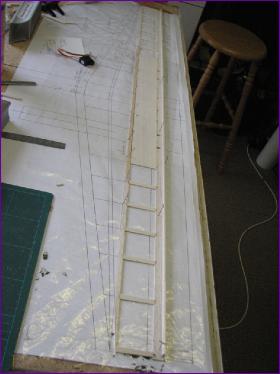
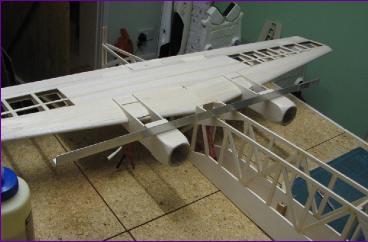
The wing construction went pretty smoothly. Since there is no dihedral, it seemed to make sense to apply the top sheeting first before threading the wiring through and finally finishing off the underside.
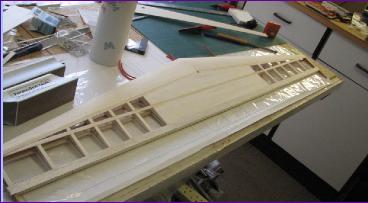
The ailerons were built next - again more detail on their construction on the October details page.
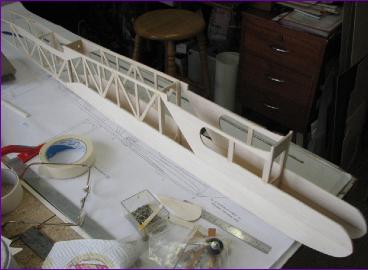
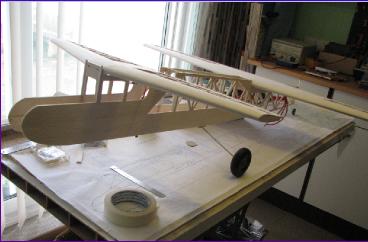
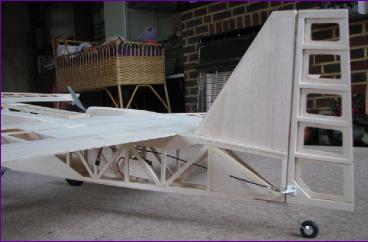
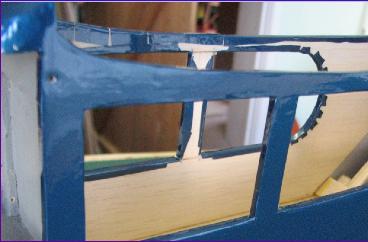
The fuselage sides are constructed of 1/8in balsa, one on top of the other. With a few simple rectangular formers cut out, the sides can be joined together.
The sides were pulled in at the tail and a mounting plate fitted for the tailwheel. With the fixing sorted out for the main gear, the fuselage could be stood on its wheels and the flying surfaces offered up to the wing seats.
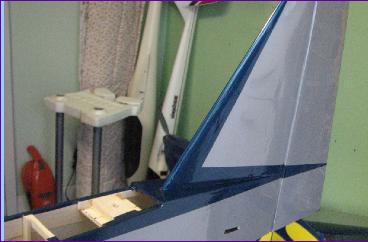
The rear end is a bit wider than the prototype in order to accommodate the tailwheel mount, so the fin was built up and sheeted with 1/32in balsa, whilst the rudder was built over a 1/16in balsa core.
Meanwhile, the fixings for the flying surfaces had been sorted so the feeling of progress obtained by seeing the model on its wheels this time is somewhat more justified.
I admit to being very pleased with this month's progress but, for a Winter project, there's now a very real risk of it being finished too early!
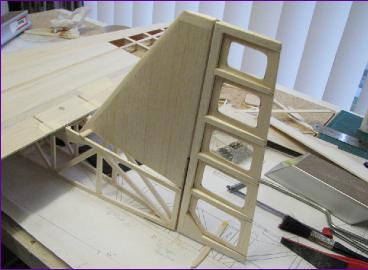
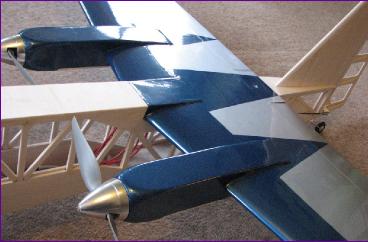
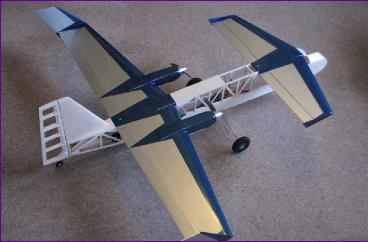
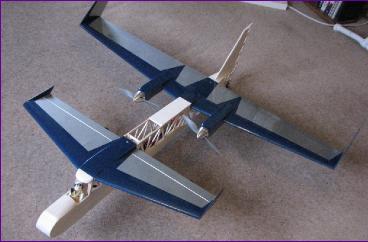
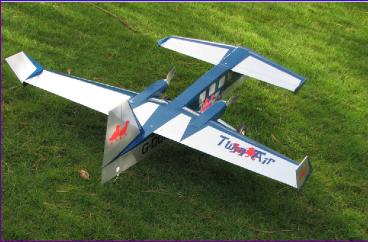
Construction work this month has been mainly about the winglets (all four of them) and the motor nacelles.There's more detail on the motor mounting arrangements on the November Diary Page.
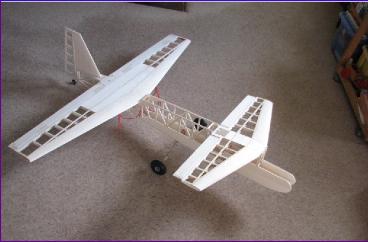
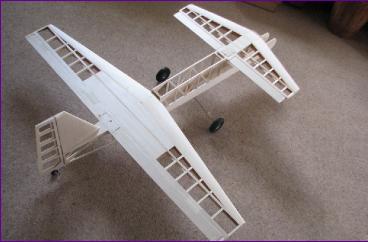
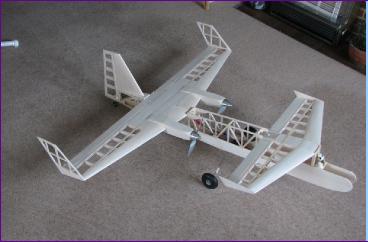
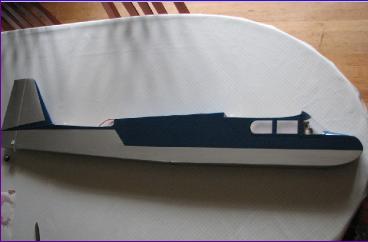
So, with all the essential components built, it was time for another photocall.
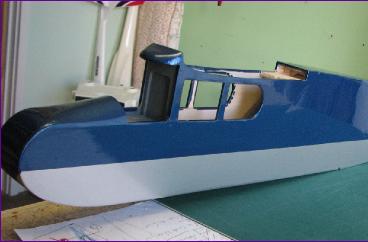
Even at this stage, it was still difficult to decide where the battery hatch was going to have to go, so I opted to get the main flying surfaces covered before trying to finish the fuselage.
So, the wing fairings were built and, after a bit more work on the nose and cockpit area, the fuselage was put aside and the wing and canard prepared for covering.
Work slowed somewhat during the second half of the month, due in part to the construction of a new Shock Flyer for our Winter indoor sessions. However, I did manage to get the Canard finished before the end of the month.
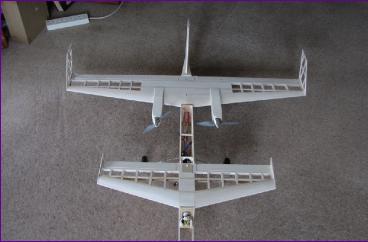
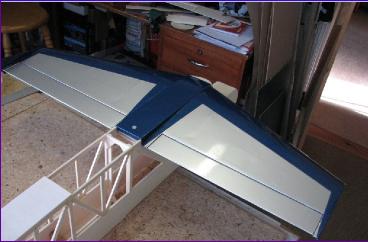
The wing, tip fins and nacelles were covered in the first half of the month
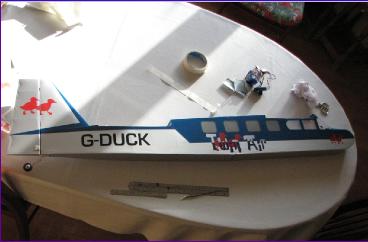
One last cg check determined that the battery would need to go under the trailing edge of the canard. I opted to stick with the top hatch as per the prototype so there was now a break in the covering while the battery stowage and wiring arrangements were finalised. See the December diary page for details.
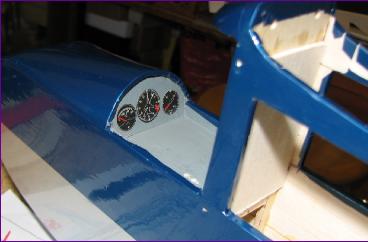
With the internals sorted, the cockpit interior was painted, then the fuselage covered, followed by the fin and rudder.
The model has now reached the stage where I can assemble it for a consultaion with Tim (aka ModelMarkings.com) to dream up a livery scheme. Other jobs for the new year include the cockpit and cabin glazing, gluing in control surface hinges and horns and making the undercarriage fairings. Then it's a case of programming the radio and doing a thorough systems check before contemplating committing aviation. Watch this space!
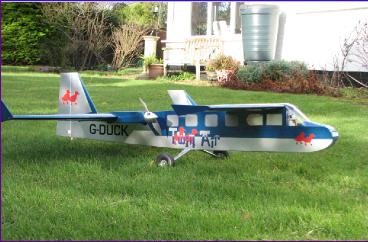
January 2015 The markings were all ready by the time I had the hinges and glazing sorted so it was time to transform the blank canvas into a spoof airliner.
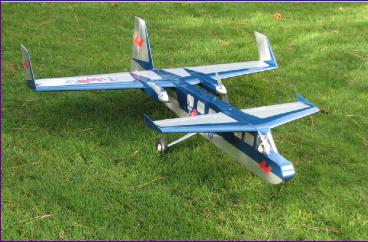
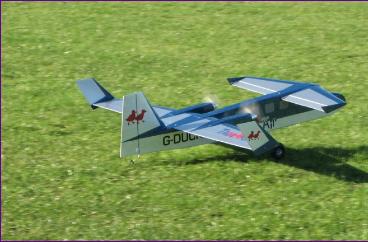
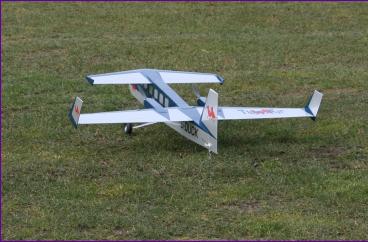
With the decals on, the model was assembled for a photo shoot on the lawn. I think you'll agree that Tim has done an excellent job.
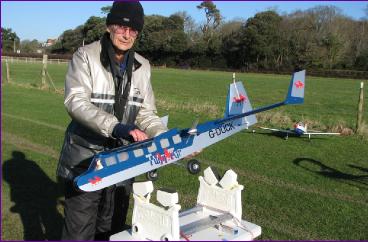
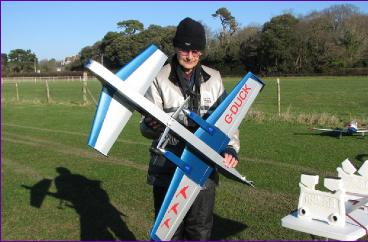
A few taxi trials showed that the model handled well on the ground but there was a nasty motor resonance at just under half throttle, triggering a worrying level of vibration. Running the motors slowly showed that the left hand spinner was running very slightly out of true and no amount of filddling around and re-seating seemed to fix it. However, there was plenty of power available and at other speeds the running was fairly smooth.
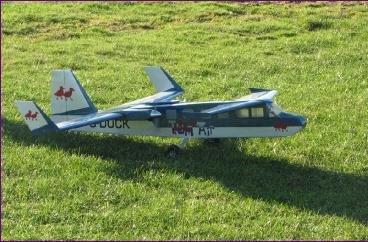
A few days later we had a cold day with a gentle northerly breeze so I set off for the field, only to find that the farmer had installed his cattle at the north end so, with the low sun to the left of us and the cattle to the right, conditions were not ideal for a maiden flight. However, the model was put together just to introduce it to the field and to take a shot of the underside artwork which I had forgotten to do earlier.
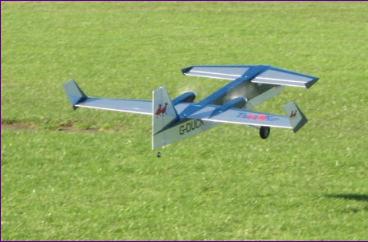
Having got this far, I thought the Duck Twin at least should get some air under its wheels so, in spite of the shortened field, opted to try a long hop.
Lined up, I gingerly opened the throttle then, as soon as the model was tracking true, accelerated briskly to try to get airborne without consuming too much of the available field.
Lift off came quickly, and the model was climbing fast. . . .
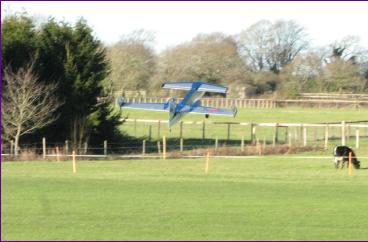
There was no time for trimming and it seemed to take forever to get the nose down so that I could throttle back, by which time the electric fence was looming . .
. . eventually, with the throttle closed, the Duck Twin condescended to descend, and rolled to a halt with its nose within sniffing distance of the fence. I admit to breaking into an unaccustomed trot in order to make sure I reached the model before the cattle got a chance to see what it tasted like.
Once I had recovered my composure, some downtrim was dialled in and a few more long hops were executed with no further dramas.
The eccentric spinner has now been replaced and the Duck Twin now awaits the next weather window which hopefully will see it enjoy its first proper flight with no further stress so, once again, watch this space.
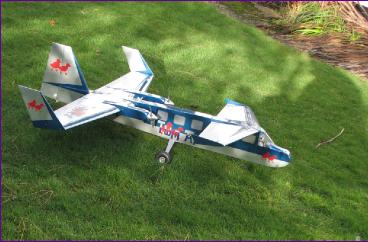
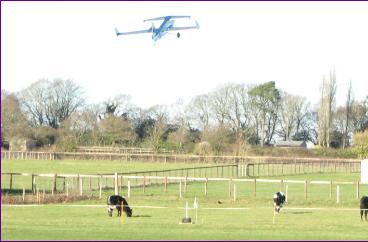
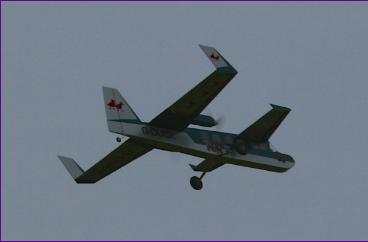
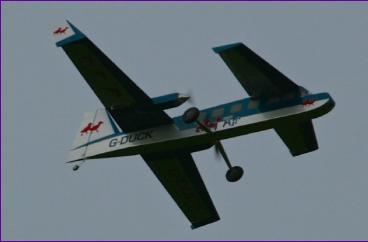
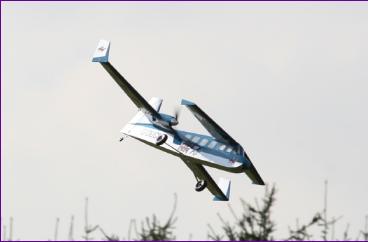
February 2015 Two more flying sessions, and the Duck Twin is now flying well. At first, it suffered from quite a bit of wing rock but switching to counter rotating props and adjusting the aileron throws has calmed things down a lot.
I still need to put in a few more hours to become fully familiar with the unusual sight of this model from all angles then it should become a very enjoyable model to fly. It is certainly fully aerobatic and so far has shown no tendency to 'bite'. The video clip (linked below) shows a few shaky snatches from the first full flights - I think the camera operator was as anxious as I was!
Thanks to Jon Goddard for the flying photos.
October 2015: Sadly, roll/yaw instability problems continued to plague this model and, even with a Guardian 3D stabiliser fitted, it was clear that the stabiliser was working overtime to control the problem. After a few modifications which at first seemed to improve things, an attempt at a flight with the stabiliser off led to a particularly severe oscillation immediately after take off. With no height to recover, the fuselage suffered some damage. Although the model was repairable, in view of the lack of progress with the flight characteristics, the decision was reluctantly made to de-commision the model after just 20 flights.